Anyone who is in my presence during the summer months knows that I could go many, many weeks without repeating dresses. I absolutely ABHOR shorts, and besides a few pairs of running shorts, I just don't wear them. Therefore, summertime means dress time, and I couldn't be happier about it.
While I absolutely love most of the dresses I have either bought or made, there's one that's hung in my closet for the majority of the summer, unworn. I love the dress itself, but I don't love the color. It's a mustardy yellow that just doesn't look right unless I am SUPER tan, which rarely, if ever, happens. I bought it sometime in the past two years at Forever 21, before the store really got into the swing of making dresses that made me question whether or not I was trying on a dress or a loose shirt. Man, I really must be getting old when my first thought in the dressing room is, "That would be SO CUTE if it had about 6 more inches of fabric in the length." Once you're out of college, and the first number of your age begins with "3", wearing super short dresses just makes you begin to look a little desperate. (Unless, of course, you have thighs like Heidi Klum, which means you can parade around in your underwear and everyone will think you're a goddess.)
Since this dress still fits perfectly well, and just needed a color change, I decided to try my hand with some fabric dye (RIT brand) to change it up. Here is a picture of the dress pre-dye:
 |
| It's alright, but it's not great. |
I bought the navy blue dye, hoping that the mixture of blue+yellow=green. I followed the directions for the dye if you're using a bucket, which I decided to do over the washer method. Having to clean out the washer afterwards and run a few empty cycles seemed like a colossal waste of water and energy to me. If I was dyeing a large amount of fabric, I might have chosen this method, but as I just had a small summer dress, a bucket seemed like it would work just fine.
 |
| Yes, I used a used paint stick to stir this up. It was better than option 2, which would have been a stick off of the nearest tree... |
The one part of the directions I ignored was to CONSTANTLY stir it for 30-60 minutes while the fabric was dyeing. No chance I was devoting that much arm muscle to it. I puttered around in the yard for about 25 minutes, pulling weeds and such while intermittently stirring the bucket (which I left sitting in the driveway to prevent spills). When I was done, I poured the mixture out behind the garage. There seems to be a vine of poison ivy there, and I'm hoping to kill it. Maybe this will help?
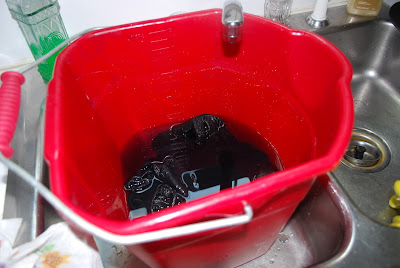 |
| Keep rinsing til the water runs clear (or clearish, if you're impatient, like me) |
After about 10 bucket rinses in the sink, I wrung out the dress and left it outside to dry. My idea of blue+yellow=green didn't quite pan out, but I did get an intriguing shade of grayish/blackish/green. I'll take it...it's more interesting than the yellow! The thread/seam lines didn't dye, but I kind of like the contrast of colors here...it adds a delightful mix.
 |
| Slightly scared when it began to look like this....did I just ruin it?? |
Now I just need the warm weather to continue into September as long as possible so that I can get a few uses out of my "new" dress before Old Man Winter forces me back into jeans and sweaters. I can always pair the dress with a brightly colored sweater and some calf boots to take me into fall, though. Happy end of summer, everyone!!
 |
| The camera comes out and Margot thinks it's photoshoot time for her. She already has two calendars to her name, and is apparently ready for a third! |


