Showing posts with label dresses. Show all posts

Thursday, May 22, 2014

Pretty in Pink

Now that spring is here, and sunnier skies are overhead, that can only mean one thing:  It's Dress Wearing Time!!  I made a recent trip to my local thrift shop to scour the racks for some gems, and it did NOT disappoint.  I walked away with several ugly and outdated dresses that were just begging for a new life!

While I've been sewing for quite awhile, last year I stumbled on a delightful little website called Refashionista that details all of the thrift shop refashions that one blogger creates...she's got some real doozies.  I've taken some pieces in the past from thrift shops and remade them into new outfits and dresses, but the website has spurred me to see the potential in the ugliest of dresses and fabrics at my local thrift shop.  Thanks for getting the creative juices flowing, Refashionista!!

Today's dress refashion started its life as a delightful little hot pink number with full sleeves and shoulder pads.  Oh, those shoulder pads.  Who invented those things??  The body of the dress actually fit quite nicely, which was my main motivation for buying it- I knew I wouldn't need to make too many alterations to freshen it up. 

Making faces is necessary so that everyone
knows this is the BAD version of the dress.
Baseball cap wearing is also necessary.


I started off by chopping those ugly sleeves off to elbow length.  Done. 

Snip, snip!  They're gone!


My next chop made orphans out of those lovely puffy shoulder pads.  Aww...where will they go now?

SOOO sad to lose these puppies.


The sleeves were slightly looser than I wanted them to be, so I made a few passes with my machine to test out how fitted I could make them while still enabling me to move my arms without looking like a robot.  Don't mind the gray thread, I was too lazy to go upstairs to grab my matching thread for basting stitches.

iPhone photo.  Not impressed.


After I got the sleeves to the appropriate fit, I cut off the excess seam fabric and sewed a tight zigzag stitch to finish off the raw edge.

Zig to the zag to the ziggy zag zag.


Now that the sleeves were fitted, they needed to be hemmed.  I folded the raw edge over twice and pressed it flat before sewing a quick straight stitch (using matching thread this time!)

Sticheroo!


I tried on the dress, and while it looked good, I still wasn't satisfied.  From the side, the pleating made my lady lumps look quite saggy....not good.  So, back to the machine I went to sew a quick seam on the sides from the armpit to the waist.  That cinched the upper portion of the dress in just enough to give my girls the appropriate lift.

No outfit would be complete without trying on various shoes
and texting the pictures to your sisters for approval!
Sorry for the weird shadows and sizing of the picture.
Dave was not very interested in spending time on blog pictures.
He had a lawn to mow!

From start to finish, I clocked this dress redo:  one hour.  If I had a dress form and didn't have to try it on a million times, it probably would have been quicker.  Oh well.  The dress itself was $6 (which truthfully, I thought was a bit expensive...I think the interior facelift of the thrift shop I go to has gone to their heads...I may be searching for some alternate shops soon!). 

Full disclosure...I am really happy that I recently created a "craft room" in the basement for myself.  All that dress trying on and off got too annoying, and I ended up sewing in my underwear...something that might have given the neighbors quite a show had I kept my machine at its previous home on the dining room table in front of 2 windows.  Yikes.  Anybody else sew in their underwear from time to time?  (crickets.....)  No...just me?  Sigh.  It's fine.

From ugly to adorable...my once outdated dress now has some new life and is loved once again!  Hooray for giving new life to old things!

Tuesday, September 3, 2013

Hemming and Hawing

Well, I've hemmed and hawed a long time over what to do with this dress.
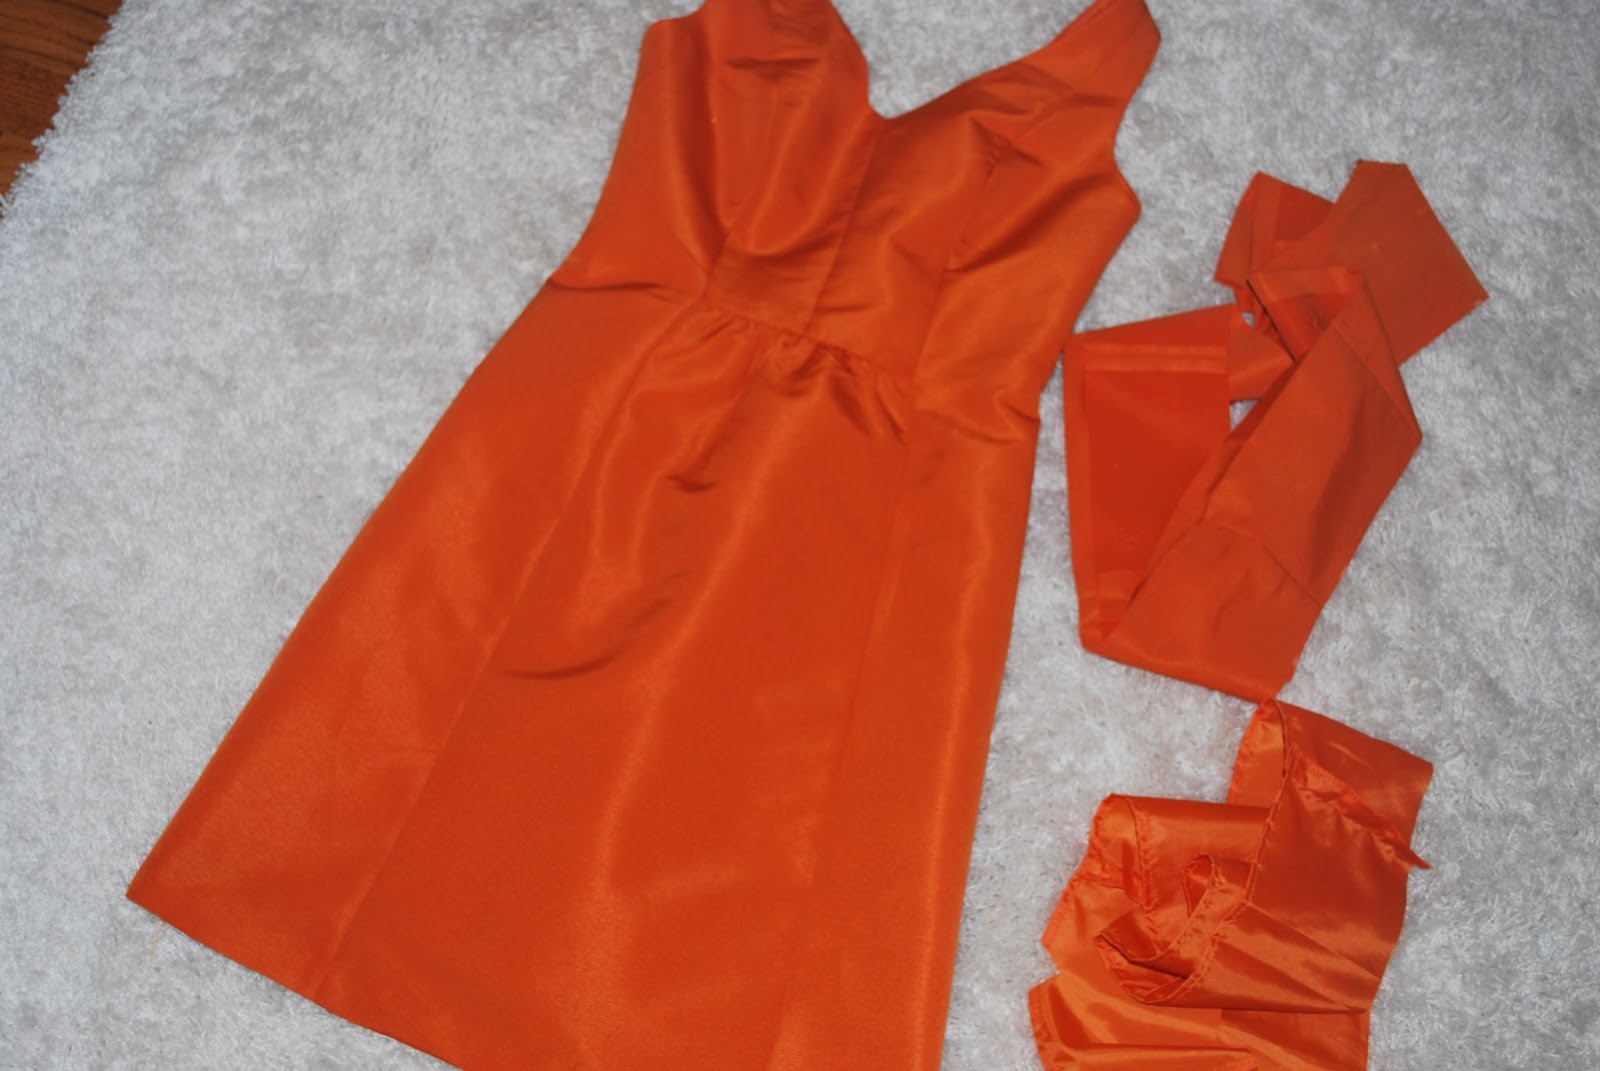
It's orange.  It's happy.  It's too long.

I wore it a few years ago to a wedding, and while I love the color, I didn't love the length.  It hit mid calf, which for ladies, is one of the worst lengths for dresses.  It makes your calves look wide, and your legs look short.  Every woman's dream, right?  I've tried it on several times before going to a dressy event, and always put it back in my closet.  It just wasn't right.

Today, instead of continuing to hem and haw over the dress, I decided to just suck it up and HEM IT.  I don't know why such seemingly simple fixes sometimes take so long to get done.  Once you do it, you're really ticked you didn't do it sooner.

If you have any sewing skills at all (and the time!), hemming is one of the simplest things you can do yourself.  From start to finish, this job took me about 1.5 hours, since I already had all of the supplies I needed.  


You're going to need more than this to shorten a hemline, but I had to prove that I was ready to go with my supplies, right?

This dress had a lining to it, so I actually had to sew two hems- no biggie.  Just make sure the lining is at least an inch or two shorter than your outer hem.  The original hemline of the dress was sewn with an invisible stitch over a piece of ribbon to hide any raw fabric edge without creating a bulky, double folded seam.  I decided to reuse the ribbon and copy the original.  If it ain't broke, don't fix it.

Original hems.


After measuring and cutting my fabric (I cut it a half inch longer than I wanted the full hem length to be), I used a seam ripper to rip the ribbon hem off so that I could reuse it.  I then sewed the ribbon onto the raw end of the dress, and folded it over, ironing as I went to create a sharp line.  

Chalk it up to good measuring skills...heh heh heh.  Good joke.

Double fold the lining to sew a neat seam.
Sewing the ribbon to the dress.
Fold the new edge over and PRESS the hell out of it.

I then used matching orange thread to sew an invisible hem onto the new length of the dress.  PRESTO..dress fixed.  

An invisible stitch should mean that you can't see it from the outside of the garment.  But what good does it do to take a picture of something you can't see?  EXACTLY.

I'm really not here to give you a full blown tutorial on how to create an invisible hem, but it is the most important part of making a dress like this look good.  You could machine sew your hem, but if you don't like the look of seeing a hemline on the outside of your garment, an invisible stitch is the way to go.   If you really want to know how to do it, or want some practice, check out Youtube.  I'm not a teacher anymore, yo.

Now hits an inch above the knee- the CLASSY length for ladies over thirty.   Feel free to bolster my self image and reaffirm my descriptive word choices.
In related news, please don't stick your sewing needle into the couch cushion in an attempt to not lose it when you jump off the couch.  You'll really regret it when you sit back down in a slightly different spot than you got up from.  OUCH.

PS- If you just scoffed at everything I wrote and took pictures of, go take your clothes to a tailor.  Somebody's gotta put bread on their tables:)

Thursday, August 29, 2013

Couldn't you just DYE??

Anyone who is in my presence during the summer months knows that I could go many, many weeks without repeating dresses.  I absolutely ABHOR shorts, and besides a few pairs of running shorts, I just don't wear them.  Therefore, summertime means dress time, and I couldn't be happier about it.

While I absolutely love most of the dresses I have either bought or made, there's one that's hung in my closet for the majority of the summer, unworn.  I love the dress itself, but I don't love the color.  It's a mustardy yellow that just doesn't look right unless I am SUPER tan, which rarely, if ever, happens.  I bought it sometime in the past two years at Forever 21, before the store really got into the swing of making dresses that made me question whether or not I was trying on a dress or a loose shirt.  Man, I really must be getting old when my first thought in the dressing room is, "That would be SO CUTE if it had about 6 more inches of fabric in the length."  Once you're out of college, and the first number of your age begins with "3", wearing super short dresses just makes you begin to look a little desperate.  (Unless, of course, you have thighs like Heidi Klum, which means you can parade around in your underwear and everyone will think you're a goddess.)

Since this dress still fits perfectly well, and just needed a color change, I decided to try my hand with some fabric dye (RIT brand) to change it up.  Here is a picture of the dress pre-dye:


It's alright, but it's not great.

I bought the navy blue dye, hoping that the mixture of blue+yellow=green.  I followed the directions for the dye if you're using a bucket, which I decided to do over the washer method.  Having to clean out the washer afterwards and run a few empty cycles seemed like a colossal waste of water and energy to me.  If I was dyeing a large amount of fabric, I might have chosen this method, but as I just had a small summer dress, a bucket seemed like it would work just fine.

Yes, I used a used paint stick to stir this up.  It was better than option 2, which would have been a stick off of the nearest tree...

The one part of the directions I ignored was to CONSTANTLY stir it for 30-60 minutes while the fabric was dyeing.  No chance I was devoting that much arm muscle to it.  I puttered around in the yard for about 25 minutes, pulling weeds and such while intermittently stirring the bucket (which I left sitting in the driveway to prevent spills).  When I was done, I poured the mixture out behind the garage.  There seems to be a vine of poison ivy there, and I'm hoping to kill it.  Maybe this will help?

Keep rinsing til the water runs clear (or clearish, if you're impatient, like me)
After about 10 bucket rinses in the sink, I wrung out the dress and left it outside to dry.  My idea of blue+yellow=green didn't quite pan out, but I did get an intriguing shade of grayish/blackish/green.  I'll take it...it's more interesting than the yellow!  The thread/seam lines didn't dye, but I kind of like the contrast of colors here...it adds a delightful mix.

Slightly scared when it began to look like this....did I just ruin it??

Now I just need the warm weather to continue into September as long as possible so that I can get a few uses out of my "new" dress before Old Man Winter forces me back into jeans and sweaters.  I can always pair the dress with a brightly colored sweater and some calf boots to take me into fall, though.  Happy end of summer, everyone!!

The camera comes out and Margot thinks it's photoshoot time for her.  She already has two calendars to her name, and is apparently ready for a third!