Showing posts with label flowers. Show all posts

Wednesday, August 27, 2014

Hammer Time.

Where has the summer gone??  I know I've been MIA for quite awhile- lots of weddings and visits to get in while the weather's nice!  Couple that with a crazy work schedule the past few weeks, and like sands through the hourglass, so are the nonexistent DIY sessions of my life.  (Days of Our Lives reference, anyone?) 

Annnnyway, here's a quick little DIY to do with little ones (because they can), or by yourself (because you can).  Either way, it'll turn out pretty!

Ooh la la...it's art!!


I found this little gem of a summer DIY somewhere online, and thought I'd give it a go.  Of course I had a hammer, watercolor paper, and blue painter's tape hanging around- staples of a DIY'er, really.

Supplies.  Yeah, it's upside down.  Live with it.
If you can't tell that it's a pad of watercolor paper, you're blind.


Here's what you do:

Pick some fancy flowers and leaves.  Try to pick ones that aren't super thick and watery- they might just burst when you try to hammer them.  Or, pick exactly that, if you want to create a messy explosion of plant juices.  Your choice.

SPLAT.

Yeah, that was kind of a mess.

Arrange your flowers artfully on your watercolor paper.  It's important to use watercolor paper and not just any old regular printer paper- the watercolor texture and absorbency is what you need for this project.

Or, arrange your one flower artfully.
These dang petals tend to stick in a clump!


Next, cover your flowers with painter's tape.  Make sure to cover the perimeter of the flower securely for best results.

Tape it down now!


Then, hammer away!  If you want to take a few quick hits and then pull the tape up a bit to check your progress, feel free!  The painter's tape comes up  easily, so you can see if additional hammering is necessary.

Looking good!

Use some fun stamps and a ribbon, and you've got a pretty little door hanger!
Too cute, right?

After you've done all this, mail the hammer and supplies to your sister for her 5 year old's birthday.  She'll really love you for it.  Promise.

Sunday, May 4, 2014

Spring has Sprung!

I've been busy this past month.  Really busy.  Unfortunately, my busyness had little to do with crafting, hence the hiatus.  Dave and I both celebrated our birthdays, we took his mom to Chicago for a fun little trip, and I traveled a bit for work.  Plus, I kind of got on a book reading binge on some rainy April days, which really cut into crafting time.  Sorry, friends!

I did complete ONE small craft during the month of April, so let's get to it, shall we?  In my quest to be an organizational queen, I was working on my craft closet and found a few gems hidden in the back that were just waiting for me to work some craft magic.

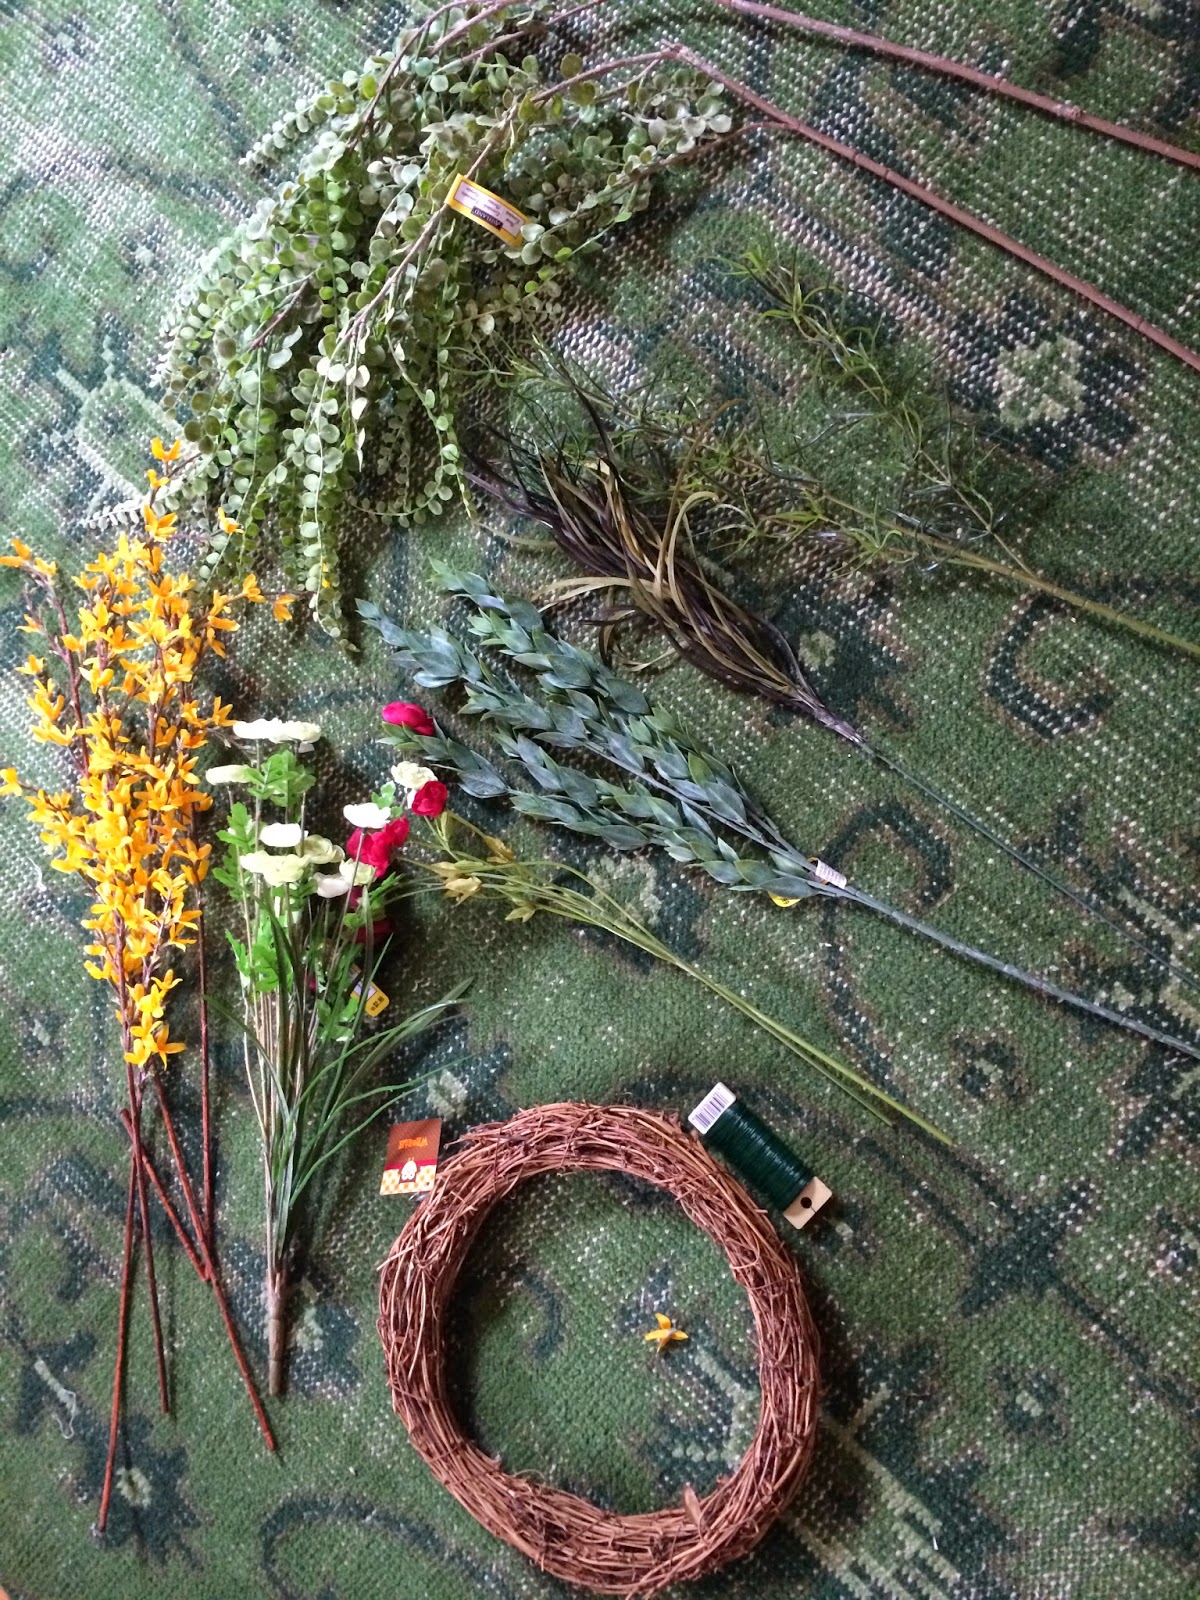
My supplies?  Lots of fake flowers and greens, a plain grapevine wreath, and some flower/craft wire.  

Let's get down to business.  

I laid out all of the flowers and greens that I had, as I wasn't sure exactly what I wanted to use.  

Supplies. Check.
Next, I started laying out some of my greens on the wreath.  I stuck the ends in through the grapevines, and the used some floral wire to begin securing the stems around the wreath.  I wanted to make sure that the stems curved with the wreath, but also hung loose a bit so that it didn't look completely structured.

Looks pretty already!  Should we call it a day right here?
 I made my way around the wreath using various greens, as I wanted to create a base layer before adding some flowers.

That's enough.  I wasn't trying to choke the wreath with TOO many weeds.
I've got a really bad habit of getting halfway into a project and forgetting about taking pictures of my next steps.  Sorry.  Here's the finished wreath with some flowers added to it.  I did the same thing as with the greens- stuck the stems in between the grapevines, and secured parts of the stems with green floral wire.

Simple, yet beautiful.

I have a single nail sticking out of my front door, so I needed something to hang the wreath up with...floral wire to the rescue!  One snip of the wire strung through the back of the wreath and twisted securely into a loop, and I was good to go.


Happy Spring, everyone!!
This project took a total of 15 minutes, start to finish.  I've had the supplies for awhile, stashed away after buying during an End of Season Sale, so I don't know how much the project total was, but I guarantee you, it was much cheaper than buying a ready made spring wreath!

Now my front door is springy and inviting!  Except to door to door salesmen.  As far as they're concerned, this wreath is made out of poison ivy and means STAY AWAY.

Have a good week, everyone!!