
Dave and I went on vacation over the Christmas holiday, and OH, WAS IT GLORIOUS. No, we didn't do a beach in Waikiki, we didn't see the pyramids in Egypt, and we didn't hop along with the kangaroos in Australia. We went to Europe, woot woot!! More specifically, we spent our vacation in Dave's motherland..the Netherlands. That's right, my 6'2" blue eyed hunk o'man lives up to the bloodlines of his ancestors who proudly stand up to the distinction of being the tallest people in the world. Man, I got a crick in my neck just by talking to people the whole week!
 |
| Sigh, can I go back? |
 |
| Such a lovely time. |
Before we left for this lovely and relaxing vacation, however, I had some crafting to do. The night before we left, I began packing. I am normally the worst suitcase packer ever, and usually attempt to bring my entire wardrobe with me where ever I go. This time, knowing I'd be hauling my suitcase from plane to train to tram, I tried to downsize. I managed to limit myself to one normal sized suitcase and a carry-on bag that held my purse, i-pad, a book, our travel documents, and the camera.
Here's where the DIY comes into play. When we go on vacation, Dave and I like to bring along the bigger camera that has several lenses. Bringing along the camera bag, however, adds one more piece to carry. Ugh. I've seen various camera bags online that double as purses, and I've also seen some great DIY camera cushion inserts for purses. Seeing as I had about T-12 hours before departure, buying a camera bag/purse was out of the question. A camera cushion insert? Totally doable.
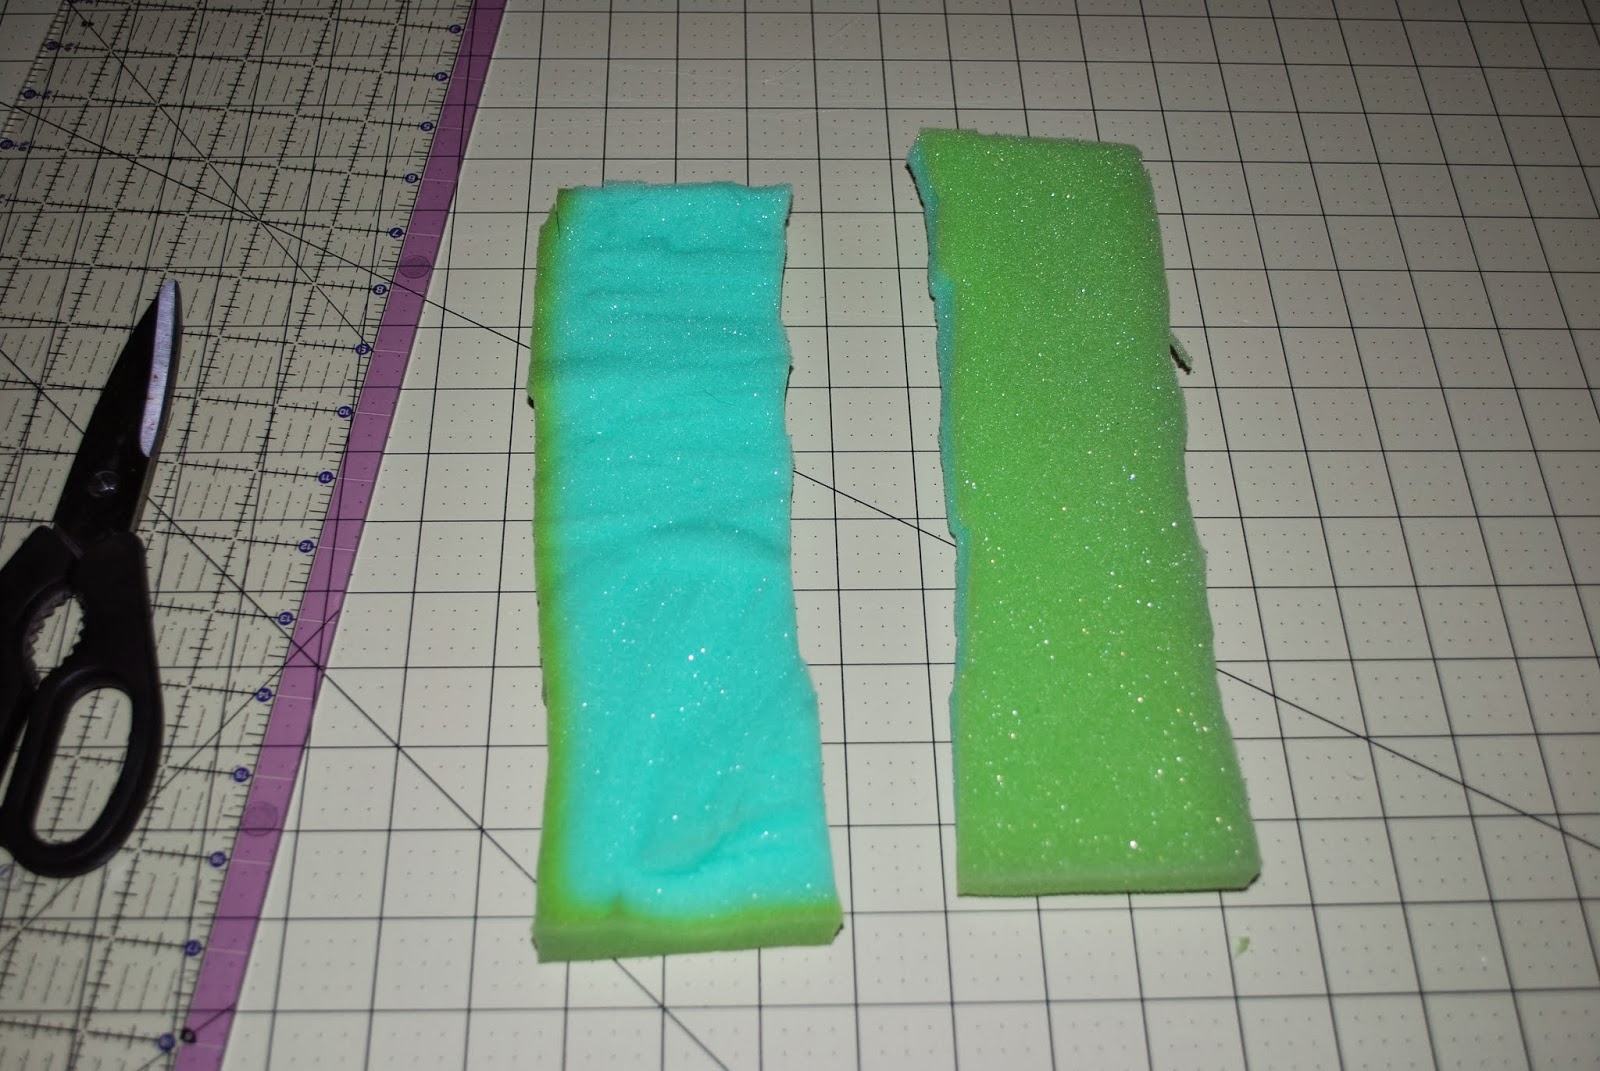
I rifled through my craft closet, hoping to find some thinner foam padding, but alas, no luck. I did have a thicker hunk of foam, which I figured would work in a pinch. I also had a nice piece of fabric that I had just used for a small Christmas gift, and wanted to use it up on something cute. Perfect!
I started off by stealing a few knives from the kitchen- a bread knife and a steak knife. Feeling uneasy with this project yet? I also grabbed my sewing scissors, not knowing what would work best on attempting to fillet the foam pad down to a desirable thickness.
I ended up using both the bread knife and the scissors. It would have been much easier if I had just used a 1" thick foam pad, but beggars can't be choosy at 9:00 at night. The clock was ticking.
 |
| Wow. Check out that yellowing action on the edges of that foam. Classy. |
Next, I measured the flat bottom of my purse, and made sure that my large piece of foam was cut to fit this size. I then cut 4 additional pieces that were a few inches high to make the walls of my foam "box".
 |
| The sides cut to fit the long lengths of the bottom pad. It doesn't matter that they're not 100% smooth- they're going inside of a fabric sandwich soon. |
Next, I cut six pieces of fabric. I cut two pieces to make sleeves for the long sides, two pieces to make sleeves for the short sides, one piece to make a sleeve for the bottom piece of padding, and a white piece of fabric to hold it all together.
 |
| Isn't that cute fabric?? |
For each foam piece, I essentially cut enough fabric as if I was cutting wrapping paper to wrap a present. I folded the fabric over, sewed two sides, and stuffed the foam in. I wasn't going for super precision here...it's going to be shut up inside of a purse. Also, the clock continued to tick, and I needed to finish packing and get to bed!!
 |
| Yep, the foam is in there. |
After my 5 foam pieces were packed in nice and tight to their fabric homes, I needed to connect them together. Here's where the white piece of fabric comes into play. If you notice from the photo with the white fabric above, I cut off the corners to make a small flap on each side. This flap would be sewn into the open end of each fabric pouch. A picture's worth 1,000 words, right? Here's what I ended up with:
 |
| All 4 foam side pieces sewn to a flat bottom. |
The next picture shows the above picture with the large foam pad sitting on top of it. This will all make sense in a moment.

 |
| Ahh, get it now?? |
Once inside the purse, the four pieces attached to the white fabric fold upwards to conform to the sides of the purse to make a nice cushioned box for my camera.
 |
| Pretty nifty, no? |
 |
| Perfect fit. |
I bought this purse last year at DSW for $5, no joke. It's actually a really nice leather purse in a pewterish color, with several inside pockets and a removable cross body strap. It's too big to carry on a daily basis, but it's great for traveling. I was able to stuff two passports, lipstick, cell phone, credit cards, a city map, Flat Margot, and some change into the side pockets. Perfect.
My regulars know who Flat Margot is, but in case you haven't been introduced...
 |
| Flat Margot rides a bike along the canals in Amsterdam. |
And the camera bag/purse? Worked perfectly!! The camera came back in one piece, and it captured some great memories, too. Like this one.
 |
| Always ask someone holding a better camera than yours to take your picture. They won't mess it up, and they won't try to steal it. They also won't be able to make your husband smile for a picture. Like, ever. |
Ready for a teaser for the next post? It includes paint, cigar boxes, and water. Take your best bet. I guarantee you're wrong. Unless you follow me on Pinterest, in which case, you'll probably figure it out. Happy crafting, kids!!
Speaking of DIY travel accessories - Did I ever show my homemade money pouches? One for Kevin to wear around his neck, two for me to wear... in my bra, of course! They worked great but not cute like your camera pads!
ReplyDeleteNo, I haven't seen them...show them to me!!
ReplyDelete