
For me, cold weather coupled with a traveling husband gave me a lightbulb moment. I needed a new couch quilt, and what better time to get started? It's dark before dinner time, I'm definitely not venturing out to the gym, Dave's not around to entertain me, and there's only so much HGTV and Pinterest one can browse through without getting itchy to try something new.
I currently have 2 couch blankets: one that is double sided fleece and is about 6'x7' that I made last year, and an off-white small quilt that I bought about 8 years ago from Homegoods for probably $20. The fleece blanket has technically been termed as Margot's blanket, because this is the blanket that she is commanded to chew any bones on so they don't get slimy bone bits on the couch...gross. While she may be stubborn and not pay attention to some commands, Margot fully understands and obeys every yell of, "ON THE BLANKET!" when she gets a new bone. I think she knows that she won't be getting any more doggie crack unless she obeys this particular command. Since it's made from cheap fleece from JoAnn's, I really could care less if she chews holes in it, or how pilled it gets from consistent washing to keep it nice and fluffy clean.
The other couch blanket is usually folded on the back of the couch, and gets used on cold mornings when either Dave, Margot, or I are currently using the fleece blanket. I like this small quilt, but over the years, Margot somehow (and stealthily) managed to fray/chew some of the edges of it, most likely while still in puppy mode. It's looked pretty frayed for awhile, but it looks fine when folded on the couch, so no one's the wiser when they visit. Until now, when I just showed the world. My secret is finally out, what a rush. Whew.
 |
| Oh, it's not supposed to be that way? |
All that blabbering, let's move on to the actual project, shall we? I know I just did a sewing post, but suck it up and deal with another one. Or stop reading now. Your choice. That's what happens when it's cold and I don't feel like getting out the tools to start a project. AND, I did just drill holes in my siding to hang Christmas lights and swag, so that counts, right? Wow, I'm kind of feisty today, aren't I? Sorry about that.
 |
| Let's all just calm down and get in the holiday spirit. |
Earlier this year, I pinned this website and set of directions on how to make a jelly roll quilt. It seemed like a simpler way to ease myself into quilting...
http://www.heirloomcreations.net/sewing-tips/the-jelly-roll-1600/
A jelly roll is a package of 40 or so strips of fabric that measure 2.5"x42". It can be a pack of one consistent fabric, or a mixture of many coordinating fabrics. I looked online and at the fabric store, but didn't find anything I want (and they are kind of pricy!!), so I decided to make my own. I ended up buying about 6.5 yards of fabric for this project, and cut all of it into 2.5' strips. That took me about an hour. Don't do this unless you have a cutting mat and cutting roller blade. Side note: Fill up 3-4 bobbins ahead of time with the thread you're using- you'll go through them all, and it's nice to have them ready to go. Buy some Aurifil thread, too. You'll burn through a regular spool of thread in 5 seconds flat.
 |
| Cut that fabric! |
 |
| Jelly roll strips all done. |
I pretty much followed the directions from this website, with a few looky-loo cheats from some youtube tutorials in between for things that weren't quite clear to me. I've never made a quilt before, so I wasn't quite up on all the quilt lingo. Not quite up on the quilt lingo? I'm such a nerd...
First, I sewed all 40 of my jelly roll strips together to create 1600 inches of fabric. That's a LOOOOOOONG piece of fabric. You better have some patience if you attempt this, because it's going to get all twisted as soon as you try to lay it out flat. I watched this 6 minute youtube clip on how to sew the strips flat, but so that the seams have a 45 degree angle to them. This was super helpful for several steps of the process:
 |
| Apparently sewing by candlelight is all the rage. |
 |
| You're going to end up with quite the pile of jelly roll pieces. And then you'll be hungry for toast and jelly. |
After sewing my strips together and untangling them, I folded the strip once so that the right sides were facing each other, and I sewed a 1/4"seam on one side. WAIT...before I did this, I followed the directions from the website and cut off about 18" from one end of the long strip so that I wouldn't have any seams matching up. Don't forget to do this, it's super important!!
 |
| Once your strips are sewn together, you need to cut the edges about 1/2" from the seam and press. |
 |
| Yeah, have fun untangling that 1600" strip of fabric. And ignore that empty plant stand sitting awkwardly in the kitchen. I kill plants. |
 |
| Sew that seam. And keep sewing. And keep sewing some more. Oh wait, you're not done. Keep going. |
After sewing an 800" seam, which took foooorrrreeeevvverrrr, I cut off the folded end of the fabric, and pressed the seam down flat.
 |
| Got that? |
I then folded the fabric again, and repeated this process 4 more times. Each time you fold, sew, snip the folded end, and press the seam, you are creating a shorter width and longer length quilt face.
 |
| Sew and press, sew and press. |
 |
| Back of quilt. |
 |
| Front of quilt |
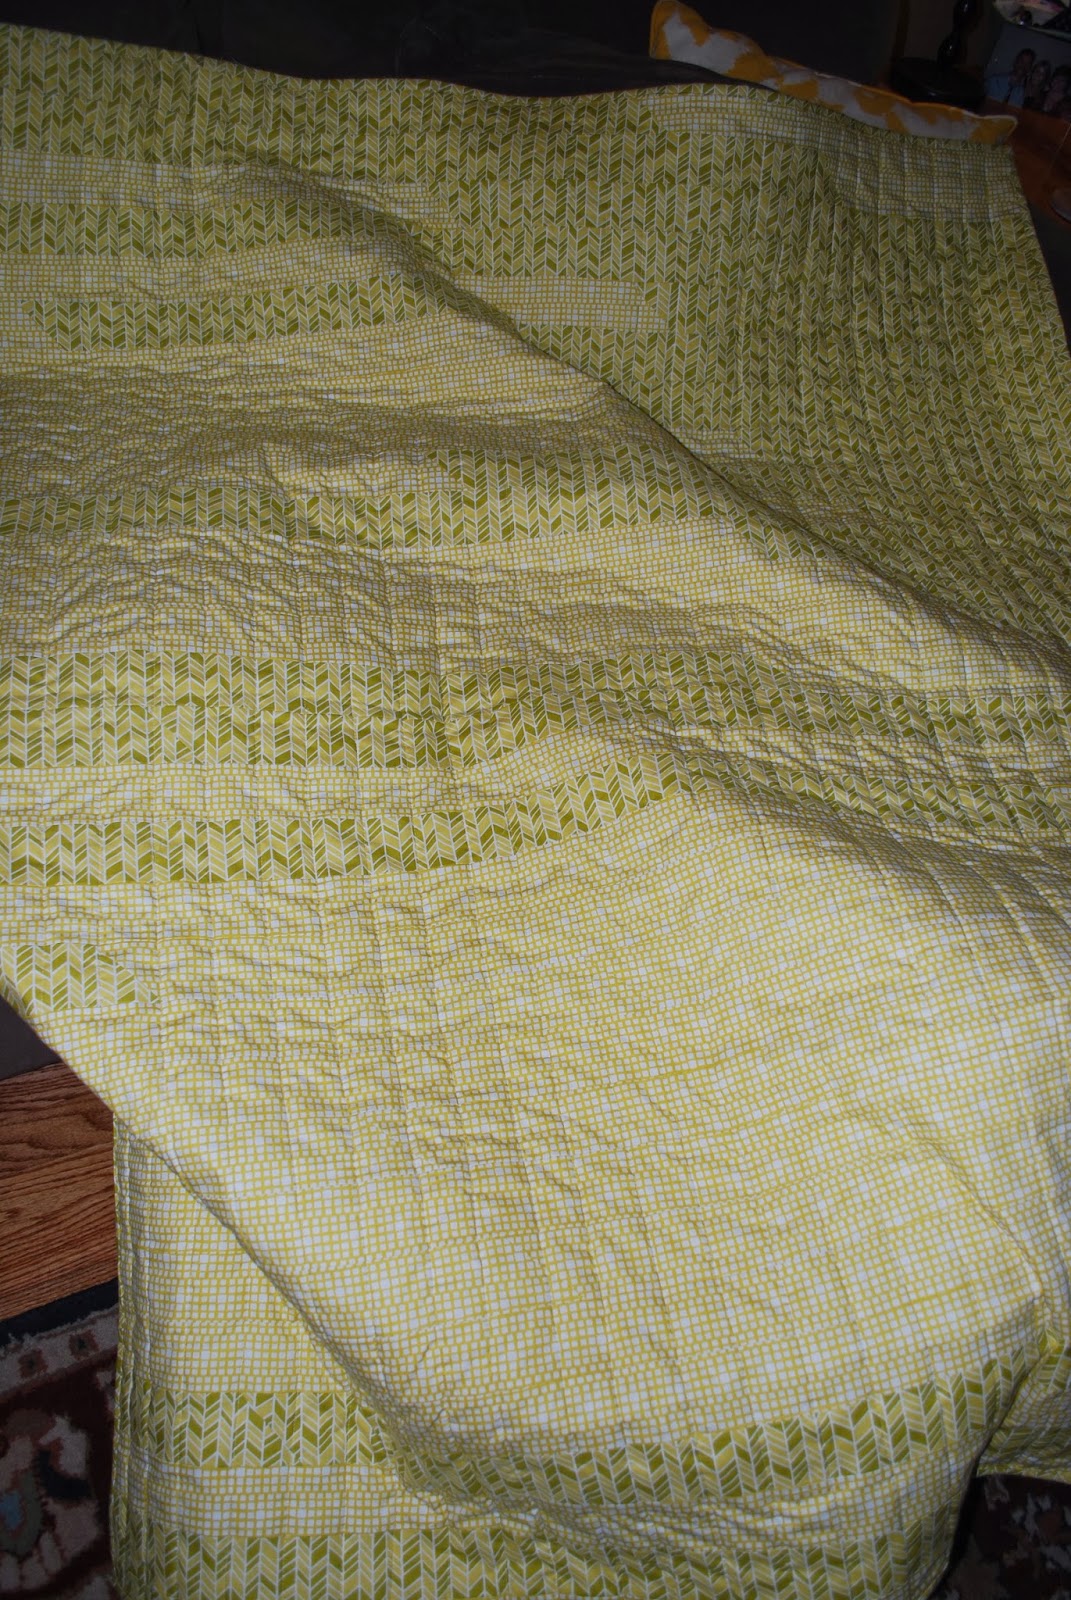
When I found the green and yellow chevron pattern, I bought 4.5 yards of it (because that's what was left on the bolt), and then bought 2 yards of the yellow block fabric. I only used these two patterns because I wanted my quilt to have a more modern and less "quilty" look that I knew would happen if I used a bunch of different fabrics.
The front of my quilt uses primarily the chevron fabric with some yellow block fabric thrown in randomly, and the back is the exact opposite. The sewing and ironing process probably took me about 8 hours total (for both sides of the quilt).
I then sandwiched the two quilt pieces right side out with cotton batting in between, and I pinned the heck out of it to keep it stable. Next came the quilting process. I measured the center of the fabric, and I grabbed some painters tape that was 1.5" wide (it was the widest tape I had on hand), and ran the tape down the middle of the quilt. I then sewed straight, vertical lines down my quilt, measuring and taping with every pass through in order to keep my lines even. I'm not ready for swirly quilting yet. Straight lines are about all I can handle right now. This process probably took me about 3 hours total. If you calculate that out, it works out to about 5 minutes per quilted line, which isn't bad, considering there are 32 quilted lines, and each required measuring and taping.
 |
| Sandwiched and pinned. With a side of Stab Yourself Multiple Times. |

 |
| Pretty self explanatory, yes? |
After the quilting was done, I needed to bind the rough edges. If you already watched the youtube video above, then I don't need to explain to you how I did this. If you didn't, do it now. It'll take me too long to write it out, when the video does a fabulous job already. If it ain't broke, don't fix it.
I used a strip of just the chevron fabric to make my binding, followed the directions, and presto! This step took about an hour from start to finish.
 |
| Pass-through #1. |
 |
| Pass through #2...the final step. |
With that, my first quilt was done. I love it, it's beautiful, and Margot WILL be trained that this "blanket" is NOT an acceptable bone chewing blanket. Poor creature, I'm going to seriously confuse her with my, "This, not That" directions.
 |
| One side. |
 |
| Finally ready for its closeup. |
 |
| Flip side. |
 |
| Wow, look at those bound edges. Fancy. |
So. Lessons learned from this project:
1. Sewing a quilt takes a Very. Long. Time.
2. Once you're done, you may lose it if anyone handles your quilt with anything other than kid gloves.
3. If you're lucky enough to have someone make you a quilt, treasure it forever. The quilt maker probably went partially blind from doing such precise sewing.
4. If you ever go to a craft fair, etc, and see a handmade quilt with a several hundred dollar price tag, don't EVER comment that it costs too much. With the amount of labor that goes into a quilt, there should be $1,000 price tags on all of them.
ALL OF THEM.
No comments:
Post a Comment