
I saw the drawing, and as usual, my creative juices started flowing. The normal first thoughts to pop into my head were:
1. I can do that.
2. Do I already have some of the supplies needed for this project? Pretty sure I do.
3. What else is on my agenda for the day that I can scrap in favor of fun projects?
I rifled through my craft closet and found my sketch pad, but still needed to make a trip to the craft store. Off to JoAnn's I went, with coupons in hand! I bought a 4 pack of drawing pens with various thicknesses, as well as a mat-less, see-through frame. I had several 40% and 50% off coupons that I was allowed to use, and the frames were already at 50% off. JoAnn's was even having a "secret" sale yesterday- anyone with a Teacher Discount Card was given 30% off of their total purchase as opposed to the usual 15%. SCORE. The sales girl whispered this discount addition to me as she rang me out so as not to alert and anger the hordes of other shoppers in line who were unlucky enough not to possess such a plethora of discount gold. Only suckers pay full price at JoAnn's. I laugh with glee at you.
Here's the materials I ended up needing to complete this project:
1 9x12 drawing sketchpad (I used an 80 lb. weight medium thickness paper)
1 pack of drawing felt tipped pens (I had various thicknesses from 01 to 08)
1 bright light
1 Clear Rubbermaid container or file bin with a piece of glass on top
1 Printout of state outline
1 11x14 frame
1 11x14 frame
 |
| Step 1: Gather those supplies, and fan them out on a pretty carpet. |
First things first- I needed to make a light box for tracing my image. It's difficult to trace images when using higher weight drawing paper unless it's illuminated from below. I used a hanging spotlight that I keep in the basement for this project. A small lamp would work just as well. I put the light inside of the file bin, put a piece of glass on top, and presto...my homemade light box was done.
 |
| Classy, I know. |
Next, I used my printout of the lovely state of Michigan and put my drawing paper on top. I used the thickest drawing pen (08) to trace the outline of the state.
 |
| Outline of Michigan. |
 |
| Beginning to trace the lines. Kindergarten skills at their finest. |
 |
| Tracing complete. We're already halfway there! |
After that, I plopped my behind on the couch to watch t.v. and got creative. I free-handed swirls, shapes, and patterns inside of the border of the state. I also drew a heart over my general location to add a little personalization.
 |
| It's getting there! |
 |
| Ooh, fancy. |
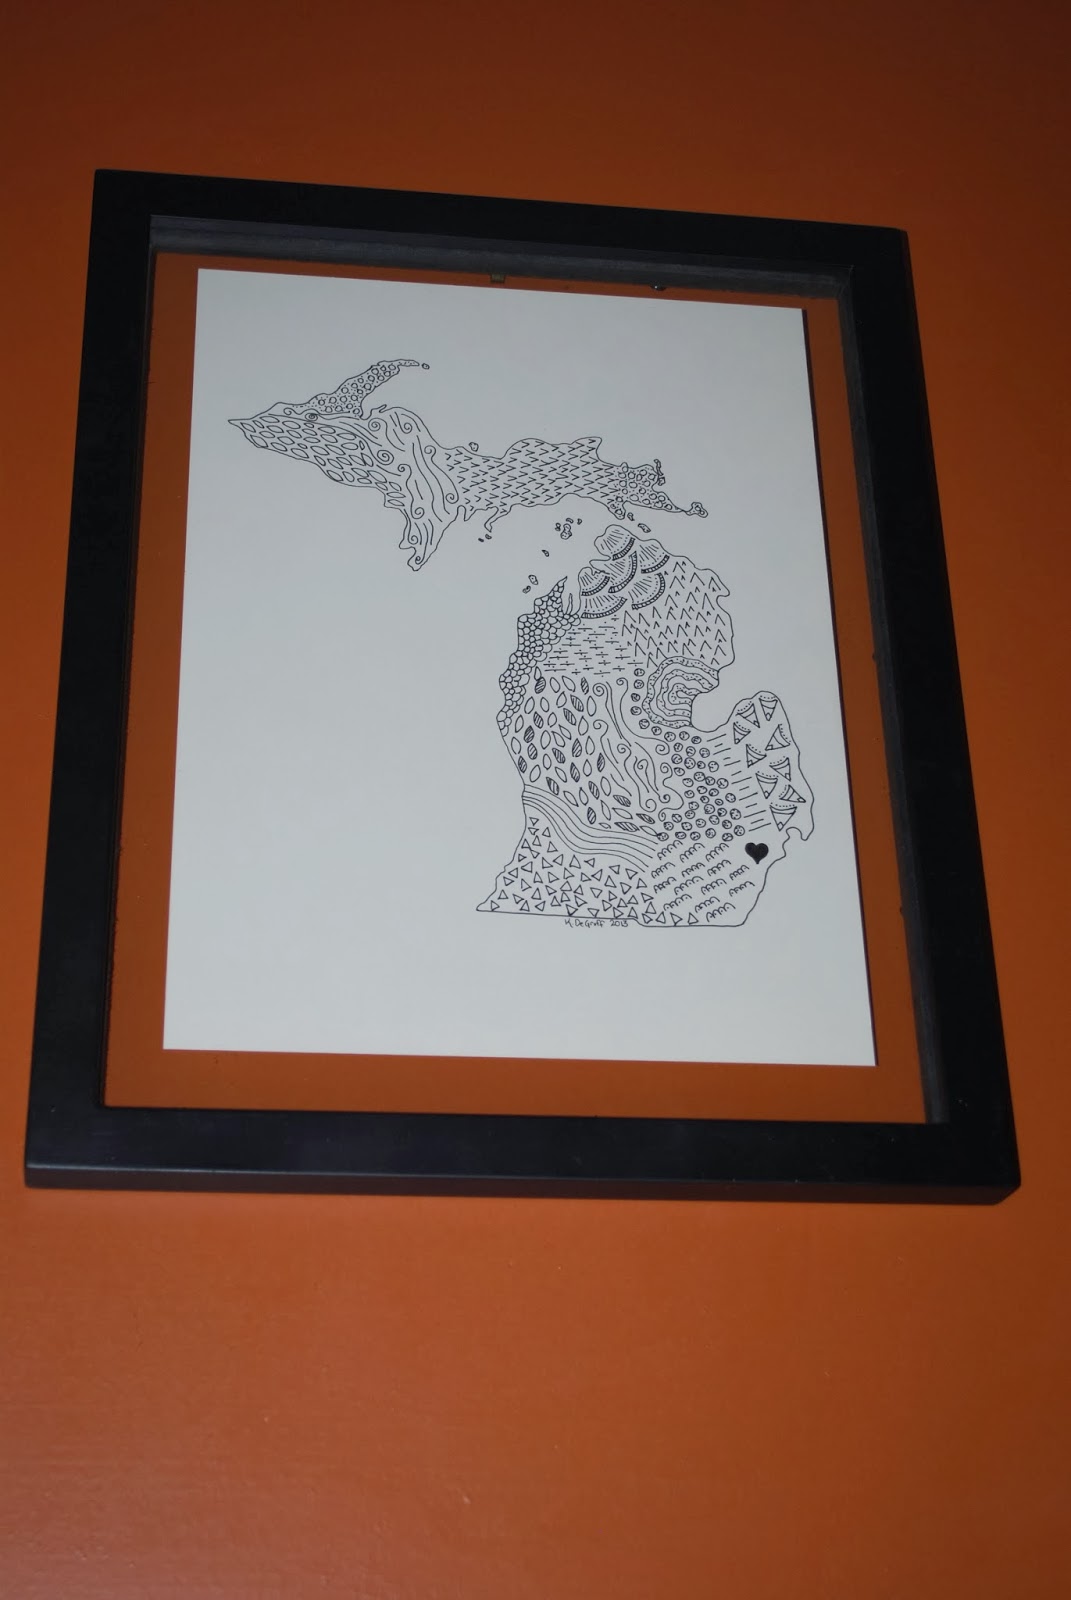
When I was done, I popped the drawing into a mat-less, see-through frame, and my masterpiece was done. How easy and cute is this??
 |
| Done. Contemplating tearing around the edges of the drawing for a more organic look. |
 |
| Super cute, right?? The paper itself is actually off-white, so in real life, it doesn't look quite so, "I drew a pretty picture on printer paper and stuck it in a frame". |
Thanks for the inspiration, Natalia!
No comments:
Post a Comment