
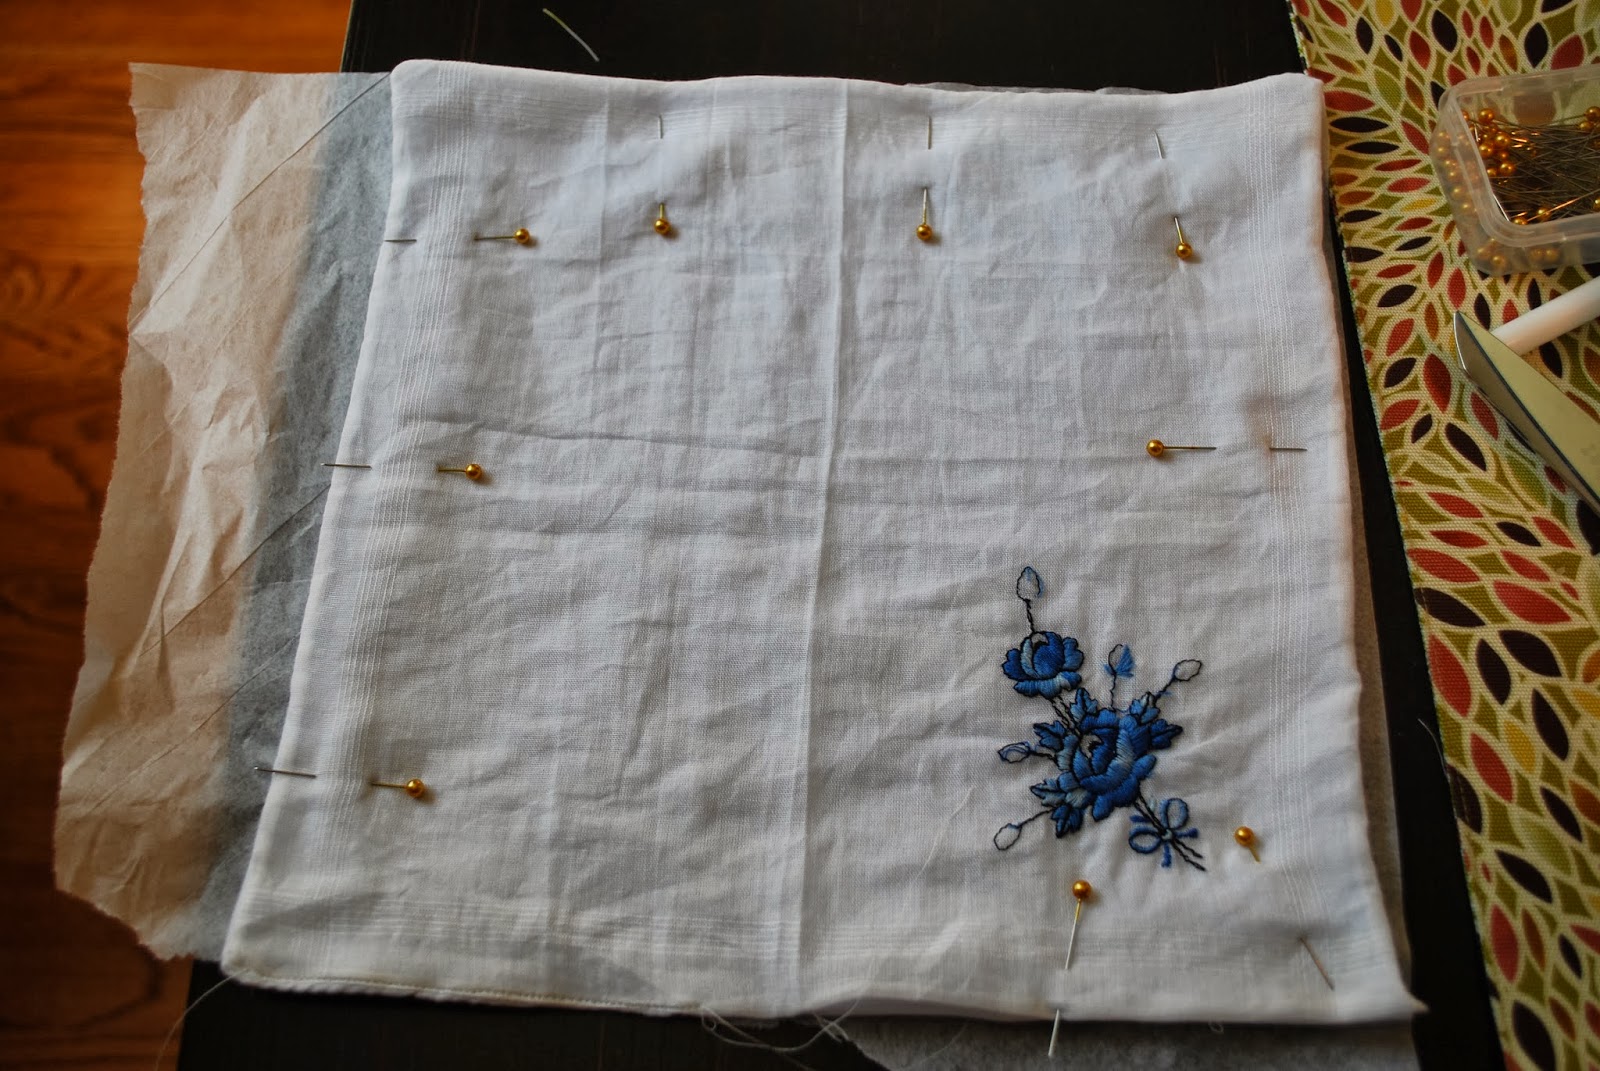
Months ago, Ally gave me a handkerchief that had belonged to her grandmother. She wanted to use it as her "something old, and something blue", but knew that she'd probably cry at the wedding and need a lot more than this delicate fabric could handle. She asked me to sew some soft fabric to the back to help sop up her impending tears of joy. I bought a small piece of white knit (t-shirt like) fabric, but before sewing, needed to clean the handkerchief- it was slightly yellow with age.

I looked up a few methods online, and ultimately settled on using a small bit of Dawn dishsoap to soak it in for a little while. It did the trick- the fabric was gleaming white again. To sew the handkerchief, I just cut the knit fabric the same size as the handkerchief, and pinned the two together (inside out). I did pin a layer of tissue paper under the knit while sewing to help keep it stable and not allow it to stretch. It definitely helped!! After sewing it inside out, I flipped it right side out and sewed a tiny seam along the outside edge to keep it pressed flat.
Another craft we did during our marathon crafting session was to create the seating card holders. Ally had saved the corks from many of the bottles of wine she and her husband-to-be, Ryan, had consumed, and she was Pinterest-inspired to use them for the wedding. We started out by boiling water, dumping the corks in, and letting them sit for a few minutes. This allowed us to use a sharp knife to cut the corks in half without them crumbling. We then waited for them to dry out a bit, and dipped them halfway into some purple RIT dye. Ally wanted a more organic feel to the corks, so we didn't try to be neat and even with our dipping...some dye ran in rivulets down the sides of the corks, and it made them look even nicer. After letting that dry, we used a sharp knife to cut a slit in the corks, slid in a paperclip, and PRESTO! Pretty place card holders! Note to self: Use gloves next time. Purple RIT dye does not make for beautiful hands.
 |
| The names and table numbers were printed on table cards from Michaels, and the gems were meal indicators. |
Ally also bought a number of cheap frames from Ikea, and we turned those into chalkboards. We spray painted the cardboard from the backs of the frames, and used that as our base for chalk sayings.
 |
| Yes, I know this sounds weird- the HAVE is missing from this photo. |
Ally had previously printed off the lettering she wanted to use, and we played around arranging where the words would go. Next, I took the lettering, flipped it over, and traced the backwards letters with regular white chalk. We repositioned the words face up on the chalk board and rubbed over the pieces of paper, leaving the chalk residue right side out in order to trace over it with a chalk pen.
 |
| Can you see the light chalk outline she's drawing over? |
After this, the board was done and ready for the wedding site!!
 |
| Beautiful, no? |
 |
| Hotel door hangers! |
After making these, Ally used a circle punch to cut the door knob holes. The thickness of the paper left some jagged and feathery edges on the circle, though, so we recut them using a Fiskars adjustable circle cutter. It has a sharp blade on it that cut through the thick paper much more nicely.
Ally also made the table menu cards that were part of the centerpieces. The cards were printed on pearlized 8.5x11 sized paper, and then cut using an office paper cutter which we did NOT take home over the weekend from someone's place of employment. Ahem.

 |
| The vase that the card is sitting in were from CB2...great find!! |
Publisher was also used to create these cute "tickets" for the photo booth. They were placed at everyone's seats, and ensured that some very memorable photos were taken!
 |
| Dear work, please do not recognize your paper cutter. |
 |
| It is grossly apparent by the bottom right photo that I have no idea what sexy is by the face given when Jenny shouts, "Make a sexy face!!". |
Our second crafting session had us working on a few things. We took a large frame (again, from IKEA), drilled holes in it, attached hook screws, and ran wire through the screws. The purpose of this frame was to hang cards with all the wedding guests' names on it. Upon entering the reception, guests were asked to place their cards in one of two glass jars. Each name in the jars represented a monetary amount that Ally and Ryan would donate to the charities of their choice. What a nice idea!!

 |
| Girls using power tools, yeah! |
 |
| Mini clips and names. Ready for a charity competition! |
 |
| Ryan's charity: Global Volunteers: Tanzania Program |
 |
| Ally's charity: The Crohns and Colitis Foundation of America |
Next up: letters!! Ally bought these block letters at one of the local craft stores, and we painted them with a hammered silver spray paint. I then took a skinny piece of wood, painted it white, and glued it to the back of the letters to help them stand up on the table. Ally had a pillow made that she set at the bride and groom table, as well. The vase painted with the white ampersand held the bridal bouquet after the ceremony. I think it's a good sign that I never got a picture of it- too busy dancing and having actual fun!!

Weddings are such fun, aren't they? As much as I love the crafty prep that goes into them, I'm even more of a sucker for the wedding itself. The googly eyes, the hand holding, the WEDDING NIGHT...and I'm not even talking about the bride and groom (insert rim shot here.) It's probably best I end here before making any more inappropriate jokes.
 |
| Wishing you both a lifetime of love and happiness together!! |
xoxo, everyone.
No comments:
Post a Comment