Showing posts with label closet. Show all posts

Monday, November 3, 2014

Whatcha doin' with that Washi Tape?

Every time I stop into a craft or office supply store, it's there.  Rows and rows of beautiful washi tape, the colors and patterns a visual feast for the eyes, whispering, "Take me home.  Please.  Just take me home."   For a few bucks, I'm more than happy to oblige their quiet longing.

If you're not familiar with washi tape, get on the bandwagon- you can use it to decorate just about anything!!  It's really just glorified masking tape, and it's pretty sad that TAPE makes me gleeful these days, isn't it?  I'm really getting old.

Let's just hop right to it- here's some fun things I did recently with washi tape!


Picture frames!  

I contemplated painting these cheap black frames that I've had since college, but a strip of gold tape did the trick!  (Prints are a greeting card print from Alaska, and a postcard of the Merchandise Mart Building in Chicago).


Computer monitor!  

Can you tell that I taped up my laptop screen, too?  There's too many big black boxes on my desk...they needed some cheap glamour.  I might have gone a wee bit overboard.
Linen Closet Shelves!
So much white in this closet...it needed a little visual eye candy surprise.


Lamp #1!

Lamp #2!
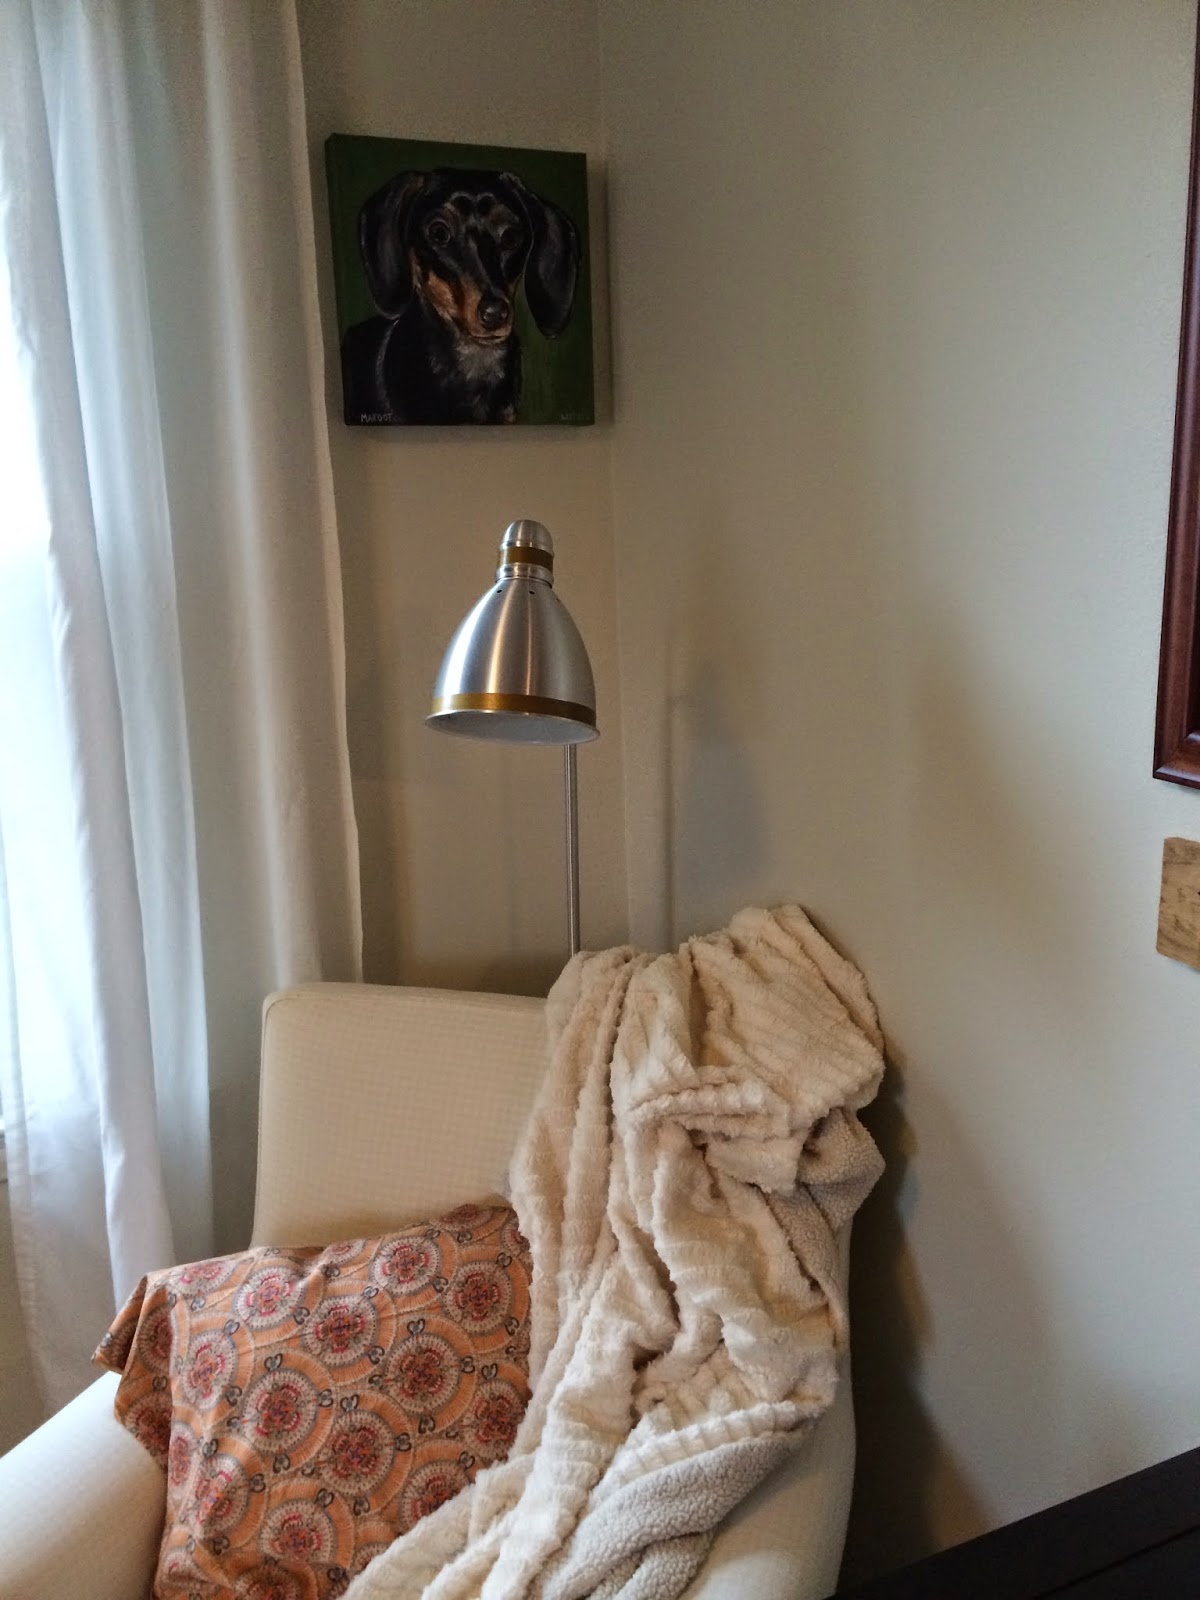
I've seen a bunch of lamps lately that have a mix of gold and silver on them, and as these Ikea lamps are PERFECTLY FINE, I added a wee bit of tape to jazz them up.  This *slightly* satisfies my urge to buy fun new lamps that have the vintage cloth cords on them- have you seen them anywhere?  They're adorable.

I also have decorated quite a few packages with the tape- it looks really cute around brown paper packages!  No one is ever upset to get a pretty package in the mail, am I right?

If you're a sad sack like me who gets excited by tape, go buy yourself some today.  It's fun, it's cheap, and it's not permanent.  Tape, tape, tape it up!


I really hope you're now singing, "Pump, pump, pump it up" repeatedly, because who knows any of the other lyrics, right?  Also, did anybody notice that my office is now white?  Woot woot...it's coming together!  I'll do my next post  on all of my office DIY's when it's cleaned up and dust free:)

Tuesday, July 22, 2014

Wanna Get in my Drawers?

So, we're obviously talking about DRESSER DRAWERS today...geesh.  What kind of drawers were you thinking?

A few years ago, we had a contractor come in and bust out a wall in the attic bedroom (excuse me, Master Bedroom) of our bungalow.  He pushed the wall back into the eaves of the roof 4 feet, and created some much needed closet space.  In doing so, he also had to rip out one set of drawers that were built into the wall.  We were able to keep the second set, so we still have one built in dresser.  I love old houses and their quirks!

Drawer Skeletor.

Boxes o' beauty.

In the meantime, I had four large drawers to DIY into something fantastic.  What to do with them?  Turn them into bookshelves?  Attach casters and use as under the bed storage?  Burn them?  At the time, I was working on organizing the basement, and needed some extra storage space, so the decision was made...drawers to shelving it was!

Yes, I can count.  I know this is a picture of only three drawers, and I had four to work with.
Congratulate yourself on being observant.

Bun feet.  The name just makes me want to give someone a hug.
Weird, right?

Since I completed this project 2 years ago, I don't have any other pictures of the process, but it's pretty easy to create a picture in your head.  Here you go:

1.  Unscrew drawer handles.
2. Plop one drawer on top of the other with the drawer faces touching each other.
3. Screw a nut and bolt through each drawer handle hole in order to attach the drawers together.
4. Attach old wooden bun feet from another scrapped project onto the bottom of the lower drawer.
5. Have a nice young gentleman at Lowe's cut pegboard for you to attach to the inside of the drawers, screw up the measurements slightly, and offer you 15% off for his mistake.
6. Smile and take him up on his offer.
7. Paint drawers with an obnoxious color just for fun.
8. Attach pegboard to insides of drawers with nuts and bolts. (Don't forget to put small scrap pieces of wood behind the pegboard so it sticks away from the drawer a bit! You want to be able to actually use the pegboard!)
9. Use s-hooks and other fun organizing peg board pieces to create easy access to your most frequently used tools, painting supplies, etc.

Pea-green in all its glory.  Don't mind all of the paint on the floor
that has yet to find an organized home.

I never said it was pretty...just basement functional!
Presto chang-o!  Wasn't that fun?  If you have extra drawers lying (or is it laying?  Grammar police, come attack, please!)  around, don't toss them, reuse them! 

I still have 2 drawers leftover just waiting for a new life.  As I'm currently creating a fabulous basement craft room, they just might get their wish soon!!

And now, a picture of me dressed up as Where's Waldo?  Why, you ask?  Why the hell not?
Side note: this was Halloween 2011- there was school that day,
and I did call down several kids to my office to suspend them while dressed like this.
First and only day that nobody was pissed for being suspended.

Thursday, October 24, 2013

Everything's a Dollar!!

Have you ever laid on the floor of a room in your house and looked at the world upside down?  If not, I suggest you do.  Sometimes it gives you a whole new appreciation for the way things look.  And sometimes, it just makes you realize that you really need to get on the ball and hire someone to fix the falling plaster on your ceiling.  Oh well.

My house is not perfect.  And that's ok.  

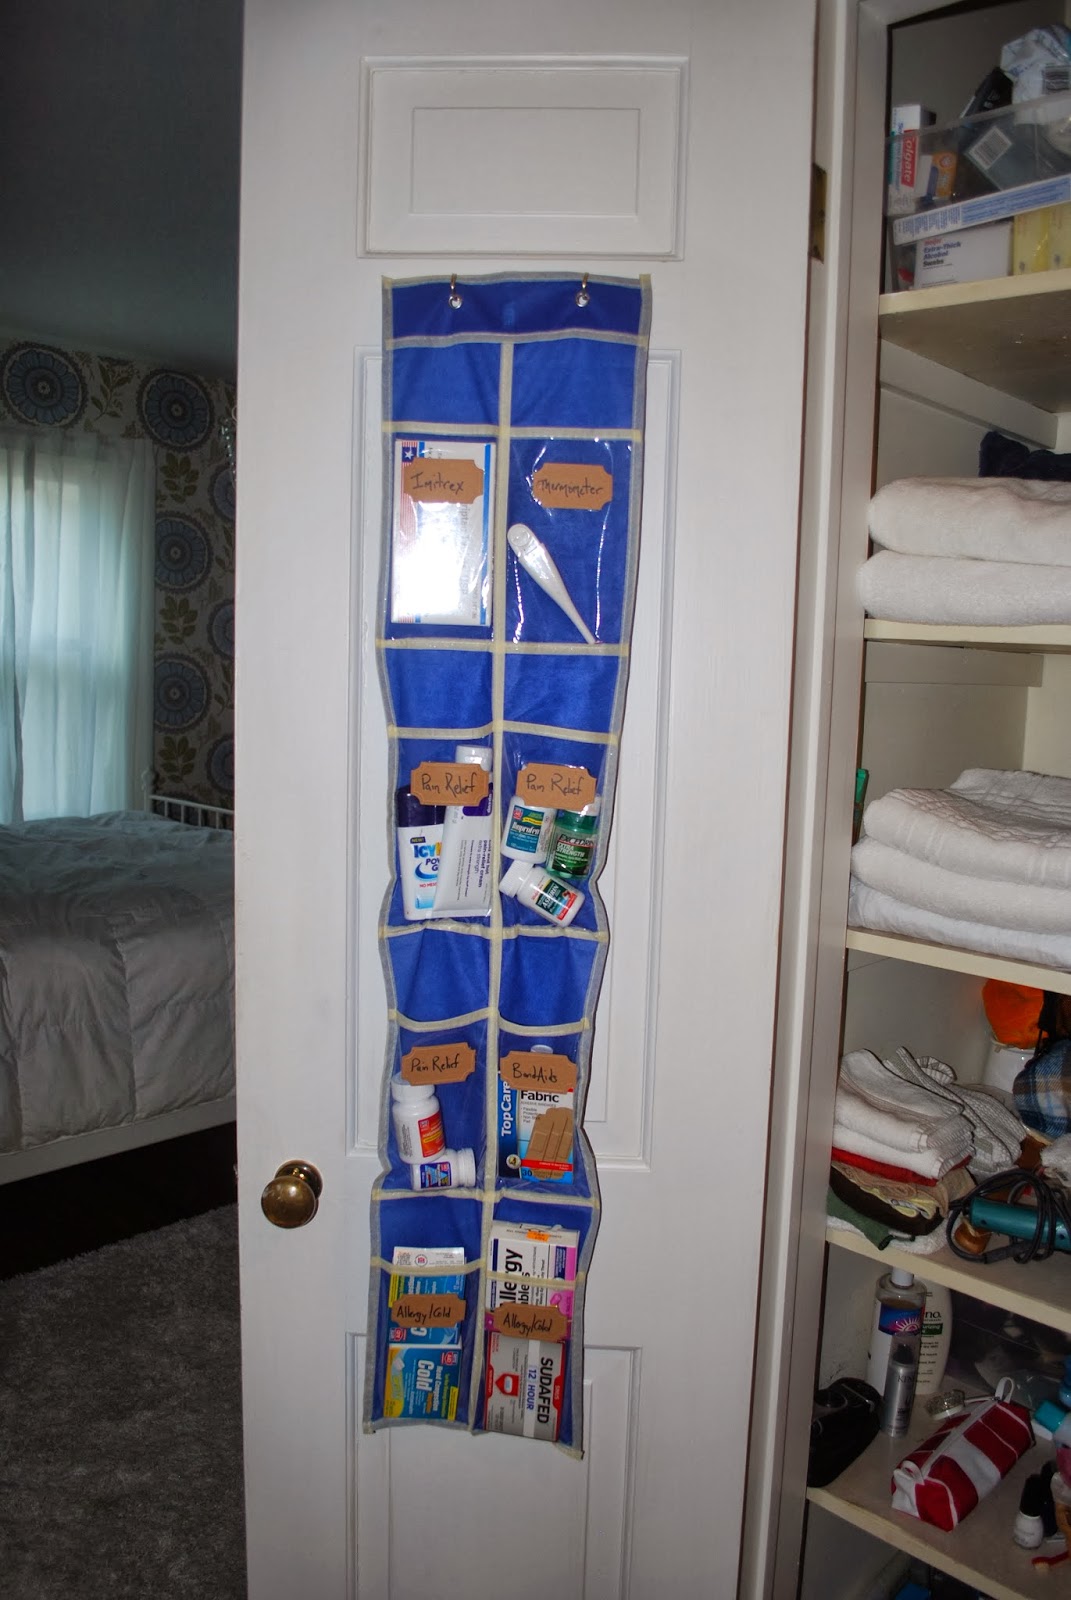
In my last post, I promised to discuss the hanging piece on the inside of my hall closet door.  I saw the idea on Pinterest and decided to copy it.  It called for a shoe organizer and some hooks- that's it.   Anybody ever try to do this, though, and realize that the cute things that someone found "at the Dollar Store" never appear in your local store?  Ugh...so annoying.  This is what I saw on Pinterest:

Cute, clear, lots of small pockets.
This is what I found at my local dollar store:

Blue, with less, and longer, pockets.

Not bad, but not great.  I was kind of annoyed by the bright blue, but for $1, I wasn't going to complain that much.  It was, after all, going inside of a closet.  I wanted to label the pockets I would be using with something, but didn't want to spend a lot of time doing so.  I had these labels in my craft closet, bought at a previous time for who knows what, and knew they'd work in a pinch for cheap, fast organizing.  All I did was use some super glue and a Sharpie, and bam, labels were made.  I think they were only two or three dollars, so the entire project still racks in under $5.  Not bad.  I suppose I could have printed labels on stickers, or on colored paper that I then could glue to the organizer, but in the interest of time (and my level of caring), handwritten labels worked just fine.

Really, Dollar Store, how would shoes actually fit in here?

From my last post, I'm sure you saw that I have two bins at the top of my closet that hold bathroom "extras", and seldom used medicinal pieces.  The Medicine bucket used to hold all medicines, pain relievers, etc, but I got annoyed with having to stand on my tippy toes every time I needed to grab something out of the bucket.  All of the medicines that get used on a frequent/semi-frequent basis went in the new door organizer. 

Because I have real wood doors (give a holla for old houses!!), I was able to just use two cup hook screws in the door to hold up the organizational hanger.  No pre-drilling, no marking, just good old fashioned eyeballin' and screwin'.  What?  Get your minds out of the gutter, people. 

Look closely.  The cup hooks aren't level, but that's because the grommet holes on the organizer weren't level.  Balancing people, it's all about balancing it out.


FYI, I have an uncanny knack for being able to tell if something is level, to about a 16th of an inch.  True story.  It's one of my many endearing qualities.  Hmm.  I feel as if I've made mention before concerning my fantastic eye-leveling abilities.  If I did, and I stated that I can level to an eighth of an inch, IGNORE IT.  It's definitely a 16th.  Really.  I swear.

Um....yeah.  We get hurt a lot.


And there you have it.  A quick project that took less than 15 minutes from start to finish.  I will never again have to search in vain for the elusive thermometer (they always seem to be lost in plain sight, right??), or reach up to grab some cold medicine.  It's all right in front of my face now.  Project complete.

Dunzo.


Sunday, October 13, 2013

October is for Organization

Bathroom organization:  Let's do it.  I have one small bathroom on the main floor of my house, accompanied by a toilet stall in the basement that was listed on the realtor website as a "half bath".

The full bath bears the brunt of all bathroom transactions, and is probably one of my most loved rooms in my house (according to my "prettiness" scale).  What, you don't rate your rooms?  Despite its lovliness, it is small, but we make it work.  There's lots that can be done to keep small spaces organized- you just have to work a bit harder at it!

Tiny, but beautiful.


Let's start under the sink, everyone's favorite space to throw junk.   The space under the sink usually becomes a haven for half used hair products, dusty old razors, and broken hair bands.  Do yourself a favor and STOP DOING THIS.  If you have a small space like mine, you may want to do the following:  Make a list for yourself of the products that you use every single day.  Empty out the cabinet, and then only return the products you use consistently.  Let's take a peek through my cabinet:


1.  Makeup case.  I don't buy a whole lot of makeup, so this is enough space for the things I use on a daily basis.  I have some more makeup in the hall closet, but it's really only stuff I bring out if I'm getting really snazzed up.

2.  Outlet:  When we gutted and redid the bathroom, I requested an outlet under the sink to plug Dave's electric razor into.  I do not like things sitting out on the countertop, and I refused to let the razor sully my clean and simple aesthetic.  Best idea ever.

3.  Tall items, like lotion and hairspray go here.  They get used every day.

4.  Vertical storage:  Use that upward space as much as you can- don't waste it!!

Up above the sink, I have a mirrored medicine cabinet.  Thankfully, the bathroom already had a space hollowed out for a medicine cabinet, so we just replaced it with something prettier.  The new cabinet has a front AND back mirrored door, as well as a mirror on the inside.  Right outside of my bathroom, there is also a full length mirror in the hallway, so I get the benefit of a three way mirror to make sure I'm looking good all the way around before I leave the house....whoo ha!  I've been so spoiled by this that now I just get annoyed when I have to get ready at a hotel or someone else's house.  Such a tough life I lead, to not be able to look at the back of my own head 365 days a year.

Well hello there, nice to see you, self.

Inside of the medicine cabinet, I try to keep things streamlined, as well.  Since I use the mirror on the inside, I don't like to clutter it up with too much stuff.  Just the daily essentials for both Dave and I.  See those small, pretty glass cups?  They hold little things, like tweezers, nail clippers, and makeup brushes.  Never hurts to have pretty organizational pieces in unexpected places!

Yep, that's my yellow retainer case.  What's up, nighttime teeth grinders?
If you have a discerning eye and you're thinking to yourself, "Well, that looks like an awful lot of girl's stuff...where are Dave's toiletries?", then I applaud you.  See that big empty space on the top shelf?  Yep, that's what Dave gets- one solitary shelf.  It's a good thing he only requires deodorant and cologne.  What a man.  (He was also out of town when I took this picture, hence the lack of man things invading my space).

For all other things we need to use, like towels and hair dryers, let's take one (literal) step outside of the bathroom to examine the rest of my storage.  It's not as pretty, but it gets the job done.

One step, wasn't kidding.


Ok, let's go down the list.

1.  Frequently used medicinal pieces.  I'll be more descriptive in my next post about this $1 DIY item.

2. "Extras" Bin.  All duplicate items, like toothpaste, deodorant, cotton balls, and soap go here.  This keeps us from ever really running out of anything.  Be prepared.  For anything.

3.  Medicine Bin.  Ace bandages, cough syrups, etc.  Things we need, but don't use very often.

4. Pictures from our trip to Alaska.  Just thought I'd throw that in there.  Make your wall art personal!!

5. White towels.  While I'm sure you can see that there are some tan towels on the shelf above, I am a big proponent of only buying white towels.  They always look fresh and clean for guests (with a little help from our friend, bleach), and will never show stained/bleached streaks from the soaps/cleaners/facewashes that we use.  Plus, they go with everything!

6. My shelf.  This is where I store my nailpolishes and other various girl things that Dave doesn't need to use.  Plus, it's just my height.  (Wait, was that a short joke?)

7. Cleaning supplies.  I keep the general bathroom cleaners in a shower caddy for easy movement, along with my vast supply of Mr. Clean Magic Erasers.  I'm not being paid to promote them, but if they are willing to pony up for my endorsement, I will WILLINGLY give it.  I heart magic erasers.  Big time.

So.  there you have it.  Lots of stuff organized in small spaces.  Once again, I am the champion of the world.

Sorry, I've been watching an Eastbound and Down marathon today, and I think some of Kenny Powers has rubbed off on me, as evidenced by that last sentence.  Please click here.  You'll thank me.


Enjoy the week ahead, everyone!

Friday, August 9, 2013

Come On In and Stay Awhile!

Like everything else in my house, my front hall closet is small.  Small, small, small.  It's behind the front door, too, so when anyone comes to visit, they must walk in, squeeze around the door while they attempt to close it, whirl around doing a 360, try not to trip over the single step up into the living room, take their shoes off, and manage to open the closet door to hang up a jacket.  That's a lot of work.

That's it, folks.

This is probably why I have never used my front door to enter the house since moving in.  I take that back.  Here is picture proof that it was used, ONCE.  We bought the house, I yelled at Dave that we needed to document our opening of the door with "our" key for the first time, and this is all we've got.  One, single entry into the house using the front door.

Yay for first time home ownership!

Because Dave and I don't use the front door to enter/exit the house, we've got a whole organizational setup going on next to the side door that I'll discuss in a later post, but this one is about my front hall closet.  For the purposes of this post, I just took a count of what is actually in the closet.  Here's the rundown:

55 pairs of shoes (boots, heels, sandals, flats- all mine) Lest you be worried that 55 isn't enough, I have more shoes hidden away in the basement and my bedroom closet.  
16 coats (Dave's and mine)
12 hats
8 prs of gloves
5 scarves
1 bin of tablecloths, cloth napkins, napkin rings
1 jumprope
2 dog jackets
1 yoga mat

Despite not using the front door every day, I do actually use the closet next to it.  Here's a picture to show how I fit everything on this list inside (neatly!)

Margot will NOT leave my side to let me take pictures!

Alright, first and foremost, the black monstrosity attached to the door...I bought this piece at IKEA a few years ago.  Because the door is a 6 panel wood door, I couldn't attach the storage container directly to it without driving the screws clear through to the other side.  Dave and I attached 4 strips of wood to the thick parts of the door, and then attached the bins to the lumber.  I probably should have painted the wood pieces to match the door, but just have never quite gotten around to it.  Maybe one day.  The bins themselves are singular bins that can be attached and stacked on top of one another.  We chose to do three bins, but probably could have fit four if we really wanted to.

Each bin pulls outward, and has a deep tub to hide your things.

For my purposes, each bin is divided up.  The bottom bin holds summer sandals, the middle bin holds flats, and the top bin holds frequently used hats and gloves.  Looking at these pictures makes me want to label my bins.  Good thing I know someone who does that...shameless plug here.

Down to the floor:  I bought a cheapo shoe rack for the bottom of the closet.  I'm still dreaming up ways I can make this closet more efficient (i.e. so it can hold more stuff), but this works for now.  My heels are arranged on the rack back to front to make it possible to hold more pairs.  And yes, they are organized by color.  You only make the mistake once of wearing one dark brown and one black shoe to work before you learn to keep things separate!!  The floor on the left side of the shoe rack houses all of my black boots, and the floor on the right side houses all of my brown boots.  I really don't ever wear sneakers unless I'm exercising, which is why there are only two pairs at the bottom of the picture.  That's all I've got.  I will have crippled feet by the time I'm 50, but I'll have a closet full of fun shoes to trade off in exchange for not wearing sensible shoes.  Such is life.

DSW and I are VERY good friends.
It's like a beautiful shoe rainbow.  Sigh.

Not sure if you can see from the picture or not, but I also use old wrapping paper tubes to keep my tall boots from falling over.  You can use paper towel tubes if you've got those.  They're free, and they work.

Last on the list is jackets and miscellaneous.  There is a window in the middle of the closet (houses built in the 40's and 50's didn't usually put a light in the closet), which makes hanging a full row of jackets difficult.  You can see the hangars and tops of the jackets from the outside of the house if I string them all the way across the bar, which is why they are pushed to each side.  This also allows me to see the top row of my shoes much more easily.  In my dreams, I have painted the inside of the closet a shockingly bright yet pleasant color, there are built in shoe racks, and the window is frosted or tinted to be reflective so the coats can be hidden.  All in due time.  Maybe this post will be a push in the right direction for me to actually make it happen!  One can wish, right?


Now, after all of my ramblings, I do actually have a point to make in this post.  If you organize and use your space wisely, you CAN actually fit a ridiculous amount of things in a tiny space.  Fifty-five pairs of shoes in one small closet is nothing to sneeze at, right??  I can't wait to do an update post when I figure out a way to double that to over 100!  Until then, I will refuse to admit that I have a shoe problem.  Right now, it's just a collection.