Showing posts with label Labels. Show all posts

Thursday, October 24, 2013

Everything's a Dollar!!

Have you ever laid on the floor of a room in your house and looked at the world upside down?  If not, I suggest you do.  Sometimes it gives you a whole new appreciation for the way things look.  And sometimes, it just makes you realize that you really need to get on the ball and hire someone to fix the falling plaster on your ceiling.  Oh well.

My house is not perfect.  And that's ok.  

In my last post, I promised to discuss the hanging piece on the inside of my hall closet door.  I saw the idea on Pinterest and decided to copy it.  It called for a shoe organizer and some hooks- that's it.   Anybody ever try to do this, though, and realize that the cute things that someone found "at the Dollar Store" never appear in your local store?  Ugh...so annoying.  This is what I saw on Pinterest:

Cute, clear, lots of small pockets.
This is what I found at my local dollar store:

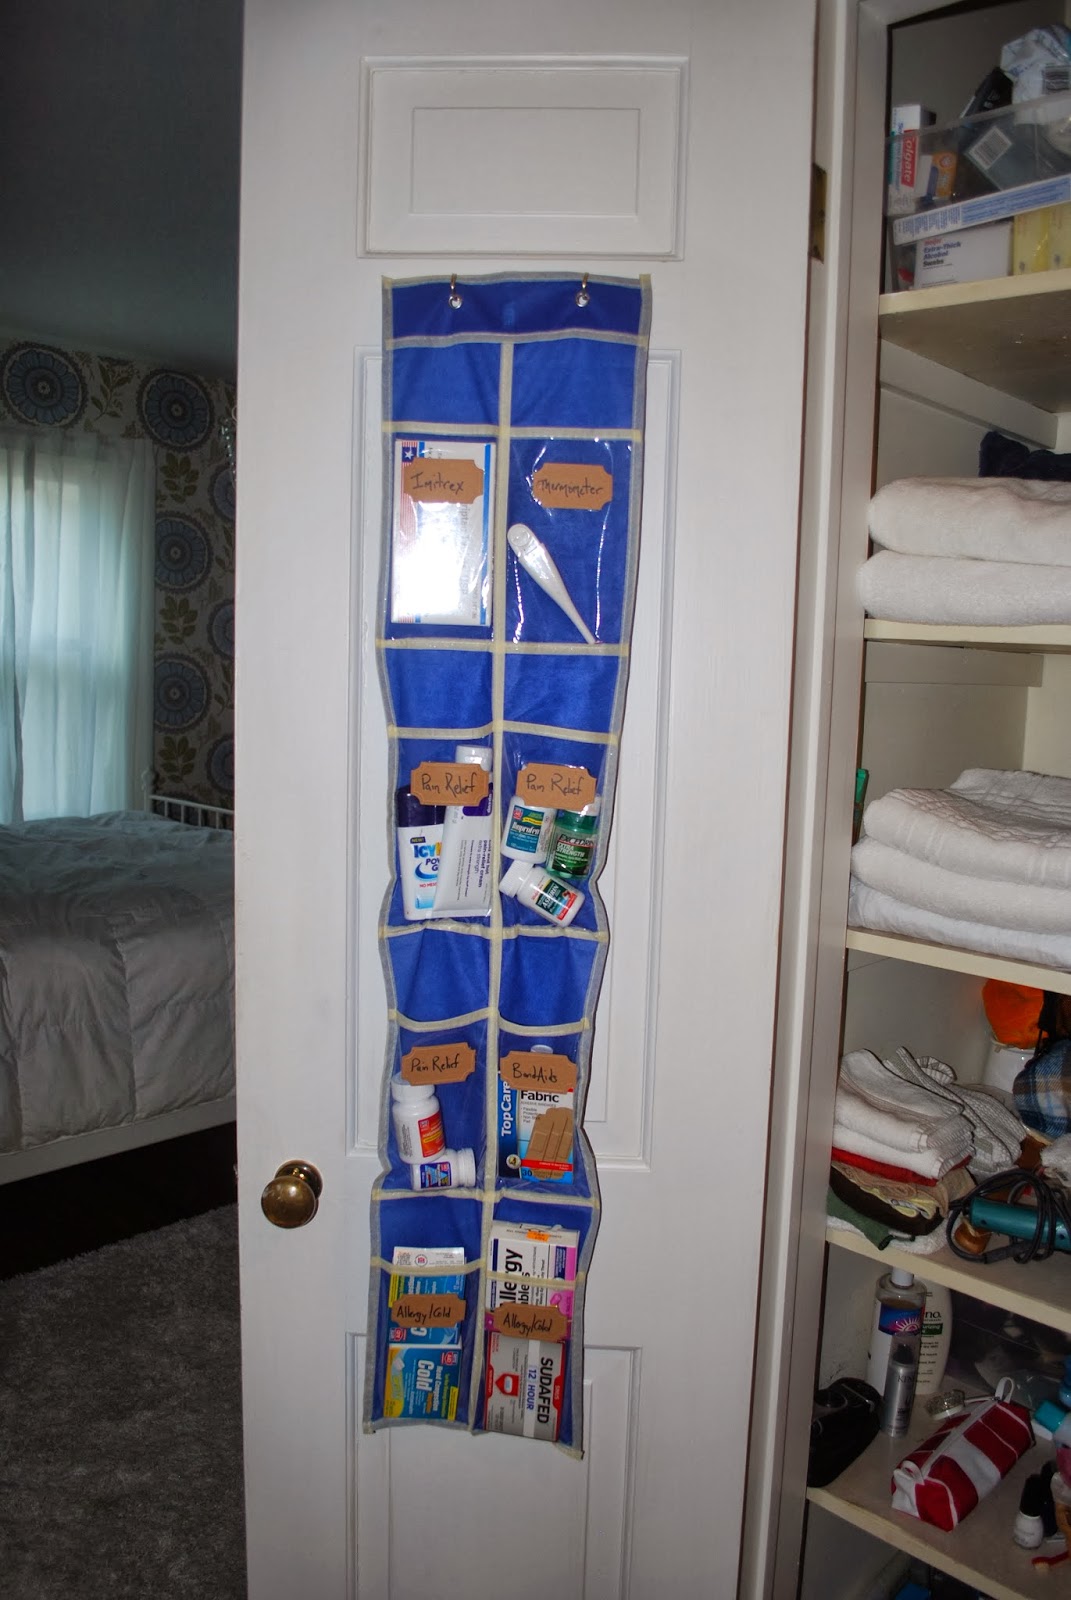
Blue, with less, and longer, pockets.

Not bad, but not great.  I was kind of annoyed by the bright blue, but for $1, I wasn't going to complain that much.  It was, after all, going inside of a closet.  I wanted to label the pockets I would be using with something, but didn't want to spend a lot of time doing so.  I had these labels in my craft closet, bought at a previous time for who knows what, and knew they'd work in a pinch for cheap, fast organizing.  All I did was use some super glue and a Sharpie, and bam, labels were made.  I think they were only two or three dollars, so the entire project still racks in under $5.  Not bad.  I suppose I could have printed labels on stickers, or on colored paper that I then could glue to the organizer, but in the interest of time (and my level of caring), handwritten labels worked just fine.

Really, Dollar Store, how would shoes actually fit in here?

From my last post, I'm sure you saw that I have two bins at the top of my closet that hold bathroom "extras", and seldom used medicinal pieces.  The Medicine bucket used to hold all medicines, pain relievers, etc, but I got annoyed with having to stand on my tippy toes every time I needed to grab something out of the bucket.  All of the medicines that get used on a frequent/semi-frequent basis went in the new door organizer. 

Because I have real wood doors (give a holla for old houses!!), I was able to just use two cup hook screws in the door to hold up the organizational hanger.  No pre-drilling, no marking, just good old fashioned eyeballin' and screwin'.  What?  Get your minds out of the gutter, people. 

Look closely.  The cup hooks aren't level, but that's because the grommet holes on the organizer weren't level.  Balancing people, it's all about balancing it out.


FYI, I have an uncanny knack for being able to tell if something is level, to about a 16th of an inch.  True story.  It's one of my many endearing qualities.  Hmm.  I feel as if I've made mention before concerning my fantastic eye-leveling abilities.  If I did, and I stated that I can level to an eighth of an inch, IGNORE IT.  It's definitely a 16th.  Really.  I swear.

Um....yeah.  We get hurt a lot.


And there you have it.  A quick project that took less than 15 minutes from start to finish.  I will never again have to search in vain for the elusive thermometer (they always seem to be lost in plain sight, right??), or reach up to grab some cold medicine.  It's all right in front of my face now.  Project complete.
Dunzo.


Monday, July 1, 2013

The Beginning


Well, let's give this old blogging thing a try.  Apparently I'm a little late to the game, as people have been blogging for forever in internet years (is an internet year even a real thing?  Can we compare it to a dog year?).  Whatever your calculative terms are, I'm sure blogging will be completely old news by the time I even get around to publishing this first post.  Oh well.  At least my mom will enjoy it.


So.  Where to begin?  I've been taking pictures and keeping a running tab in my head for the past few years of a lot of the DIY projects I've completed around the house.  Besides random Facebook posts with snarky comments, I've yet to document these projects in any meaningful way.  Something, (ahem, work) has always gotten in the way.  

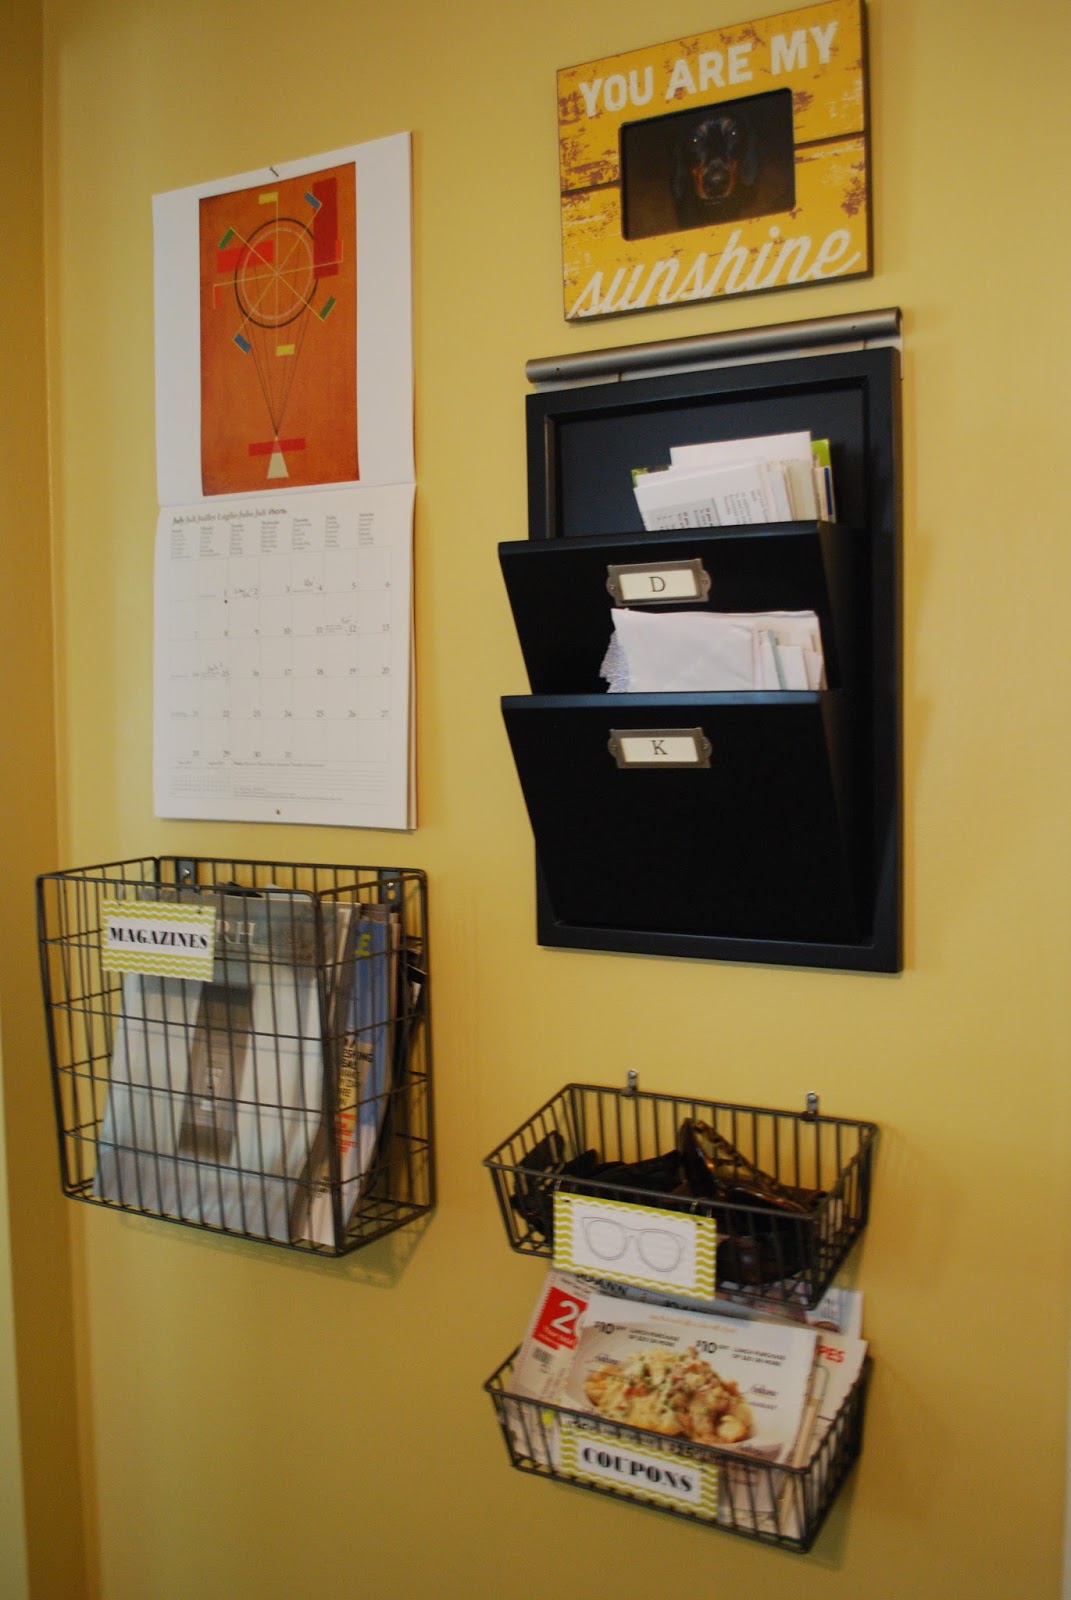
Let's start off today with a recent project, shall we?  This quick project involves coupons and magazines.  UGH.  Anybody else have such a problem getting rid of these two things? I hope I'm not the only one who has a tiny little piece of my brain that never turns off, telling me, "Hey, you really might need that tip in that article, and you DEFINITELY will need that JoAnn's coupon."  Keeping these things creates a major problem that really makes me unhappy when I walk through the front door, though: countertop clutter.  And really, who wants to be unhappy in their own house?

I began browsing around Pinterest (seriously, how did the crafters of the world LIVE before this site??) and found a few solutions that seemed both doable and inexpensive.  I already had this letter bin from Pottery Barn in my kitchen, but couldn't justify spending several hundred dollars to buy coordinating pieces to finish the look.  I wasn't interested in a whiteboard calendar, either- who has time to erase and write in a new month every thirty days??  

I made a mental note to myself to begin looking for wall bins while out at the usual places: Target, Meijer, Homegoods, Lowes.  If you're looking for organization solutions like this, remember to really think about what you need to organize first.  Nothing is worse than buying a bunch of things you think you'll use to make your life easier, and then leaving them empty because they don't really target the problem you're looking to solve.  After some halfhearted looking on random shopping trips, I ended up finding these great little wire baskets from Meijer for $7 each!  What a steal!  My next stop was Lowes to find something to hang them with.  Mirror hangers seemed to be my best bet- $2 and the perfect size.  


Several months before starting this project, my sister-friend Jen gave me a frame that was just begging for a happy home.  As I began to lay out my pattern for the wall (don't EVER hang multiple things on a wall without laying them out in a pattern first.  It'll save you a whole heck of a lot of nail holes later on!), I knew the frame had finally found its spot.  Disclaimer:  There's a hole in the wall behind the calendar left over from an old phone jack.  Everyone has their skeletons in the closet (or behind the calendar).  Don't judge.

After hanging the baskets, I knew that they still needed a little pizzaz.  My husband is a visual person (heck, who isn't?), and needed a daily reminder as to what should and should not be thrown in the bins.  A place for everything, and everything in its place, am I right?  I printed out "magazines", "coupons", and an outline of sunglasses on regular old white paper, and then took apart a lovely baby shower invite that had a chevron pattern on it, and glued them together.  BAM.  A quick hole punch and rings made out of leftover wire, and those baskets were labeled.


My kitchen wall of organization took less than an hour to put together, and for everything on the wall, cost less than $100.  Success!

One last picture that's not so close up so you can get an idea of how little space you actually need to organize piles of stuff.  (I might add some chalkboard paint at some point, but that's another day, another post!)