Friday, January 31, 2014

S(h)elf Help.

In my last post, I showed you how I made some super cute travel memento boxes.  Well, one project always seems to morph into the need for another, right?  After my travel boxes were complete, I realized that the shelves in my office needed some serious reorganization if I was going to fit the boxes on them.

...And the shelf redo/reorganization project was born!

The shelves are full, and it looks like crud.

I started off by clearing everything off of the shelves, as it's important to start with a clean palate.  Otherwise, the eyes can quickly become overwhelmed, sending Danger, Danger, Danger! signals to the brain, which will quickly shut down and say, Huh.  Another season of Teen Mom is on, let's go kill some brain cells instead of doing something productive.

TRUE STORY.

Once my shelves were empty, leaving my floor a mess, I got down to business.  I had mentally "pinned" some ideas to slightly (and cheaply) change the bookshelf, which is big, heavy, and dark.  It was now or never.  I had an extra white cloth shower curtain that had been lurking in the back of my closet for awhile that seemed like the perfect and free!!  way to give my shelving unit a facelift.  I measured the inside dimensions of the backboard of the shelves, and cut my shower curtain down to match.  The middle shelf in my piece was stationary, so I had to actually cut two pieces of fabric.

If you like the fabric on a shower curtain, but want to use it for something else, go for it!!  Sometimes buying a shower curtain for use on a sewing project is pretty darn economical- the price per yard
can be pretty cheap when you crunch the numbers.

Now, here's where I could have done one of two things.  I could have:

          A.  Used spray adhesive to stick the fabric to the backboard, or
         B.  Used tension rods to hold the fabric in place.

Due to the fact that I had tension rods and no spray adhesive, and the polar vortex was continuing to swirl outside, I went with option B.

So, I actually cut my fabric 1.5 inches longer than the backboard measurements, folded one end over, and sewed a quick tunnel for the tension rods.  The fabric was then hung against the backboard, and the remaining moveable shelves were put back in place (which helped the fabric to stay smooth and flat against the backboard).

Tension rod and fabric installed behind the first two shelves.


Now here's where the project took a slightly neurotic turn.  I separated out all of the books that had been on this shelving unit and another, smaller one in the room and made two piles:

          1.  A pile with only books that had "pretty" spines in the colors orange, grey, gold,     
          green, white, cream, browns, and black
          2.  A pile of everything else.

Pile 1 was created with these colors because I decided that they looked nice together, and because they would be the first things one would see upon walking into my office.  First impressions are everything, even with inanimate objects, yo.

Dave and I are very studious people.  Look at those book choices!  BRAINIACS.

I also had a small pile of work related pieces that needed to stay on this shelf for functionality's sake.  This is a WORKING office, after all...Thankfully, my job is about 95% paperless, so I didn't need much in the way of storage or filing/organization.  I took three of the (empty- Dave never used them) white file bins from Ikea that were already on the shelf, and painted them in the same way that I painted the travel boxes.  My few files and steno pads went inside.  (Side note...those file bins from Ikea are super cheap, and because they're cardboard, can be painted/glued/papered over very easily to match your room décor). 

Dave and I are slowly working to take over the world when you least expect it.
Again, those badass book titles speak for themselves.
(Ok, FINE.  Most of these are Dave's.  My books are in the living room...I prefer historical fiction to Ted Kennedy's memoir.  Although.....)

The shelves also held a wicker basket that included some various wires, cables, and a few electronic odds and ends that I will never need, but cannot get rid of.  Anybody else have that problem, too?  The wicker basket had previously been sitting on a higher shelf, so my short self had never looked down INTO the basket, only UP at it.  When I moved it to a lower shelf, though, I thought, ICK.  Those wires, even contained, needed to be covered.  Shower curtain fabric to the rescue for Round 2!

Saving these cords to hogtie any potential robbers that try to break into my house.  
I prefer to have only dual-use items hanging around.

I turned the basket upside down and cut out the shape with 2.5 inches of room on all sides.  I then dug around in my craft closet, found some elastic, and cut that to a length that fit snugly around the top, widest part of my basket.  Out came the sewing machine again for a quick whir around the block (or fabric edge, if it so pleases you).  I did the usual when you're adding elastic to a seam...left a few inches open, threaded the elastic through the opening, and joined the ends together.  A quick stitch to close up the hole, and Voila!  A fabric shower cap for my cord basket!


Step 1...We can have lots of fun

Step 2...There's so much we can do

Step 3...It's just you for me
Step 4...I can give you more
Can anybody name Step 5?  If you're not singing New Kids on the Block at this point, you're not an 80's baby.  Just move on, and don't try to understand.

Now came the task of arranging everything back onto the shelves.  I tried to vary the book spine colors and height directions on each shelf to allow the eye to travel along and not get "stuck" in one spot. 

Shorties on the end...heyoh!


The bottom shelf is the least interesting because, well, it's the bottom shelf.  That's the last thing people look at.  Put your interesting stuff at eye level- it'll distract people from the not so nice pieces you have elsewhere.

Heck yeah, that's a Reader's Digest DIY book on the bottom right.  Represent!


And, there you have it.  A quick shelving unit redo that looks leaps and bounds better than the original version!

No mess, no fuss, no $ spent.  Best kind of DIY!!


Monday, January 20, 2014

Boxes O' Fun.

After Dave and I take trips, I like to create photo books with some of our best pictures.  For our bigger trips, I try to document each day's excursions, knowing that 5 years from now (heck, 5 weeks from now), I won't remember some of the great details of our day to day experiences.  Those descriptions get added in to the photo books, as well.  Snapfish, Shutterfly, Costco, Apple's iphoto...it doesn't matter which one you use- they all offer page options in your photo books for straight up full page text (diary style).  


The Adirondacks, Alaska, Amsterdam.  We are moving our way through the A's, apparently.
Next up, Azerbaijan?

While I love my photo books, I am left after every trip with a variety of postcards, plane tickets, event ticket stubs, receipts, and small trinkets that I want to keep, but don't necessarily want to display on a day to day basis.  Please don't tell me to scrapbook it.  I may do a lot of crafty things, but scrapbooking is NOT one of them.  I feel like scrapbooking is one of those things where you're either all in, or all out.  You can't half-ass a scrapbook, and the doodads and embellishments needed to really make it work can start to add up...CHA-CHING!

I saw a few interesting things on Pinterest that seemed like potential projects to solve my travel paraphernalia dilemma.  This, for example, was kind of neat, but it's not something that goes with the decor of my house.  Dave took one look at it while glancing at my computer screen, and scoffed at it.  

Fancy idea, just not my style.


On to the next idea:


Gotta give credit where it's due.  This one came from my girl Martha.

This one, I thought, was do-able and practical.  All I needed was some paint and wooden boxes.  JoAnn's, Michael's, and Hobby Lobby all have similar boxes to this,  so take your pick of where you'll go.  


I bought gold, brown, and dark grey paint.  I wasn't sure which of the dark colors I might use...
at a dollar a pop, they'll get used at some point!

First things first:  I unscrewed the latches on the boxes- they weren't going to work for this project.  I could have bought similar boxes without latches, but they would have been almost triple the price.  


The hardest part?  Hunting down that super small phillips head screwdriver...grr.

After taking off the latches, I filled the holes with some wood glue, waited for it to dry, and sanded.  I did this process twice.  Because the holes are so small, it only takes a few minutes for the glue to set, so this is a quick step.  You could also use wood filler, but mine had dried out- time to buy a new pot!


Fill 'er up.

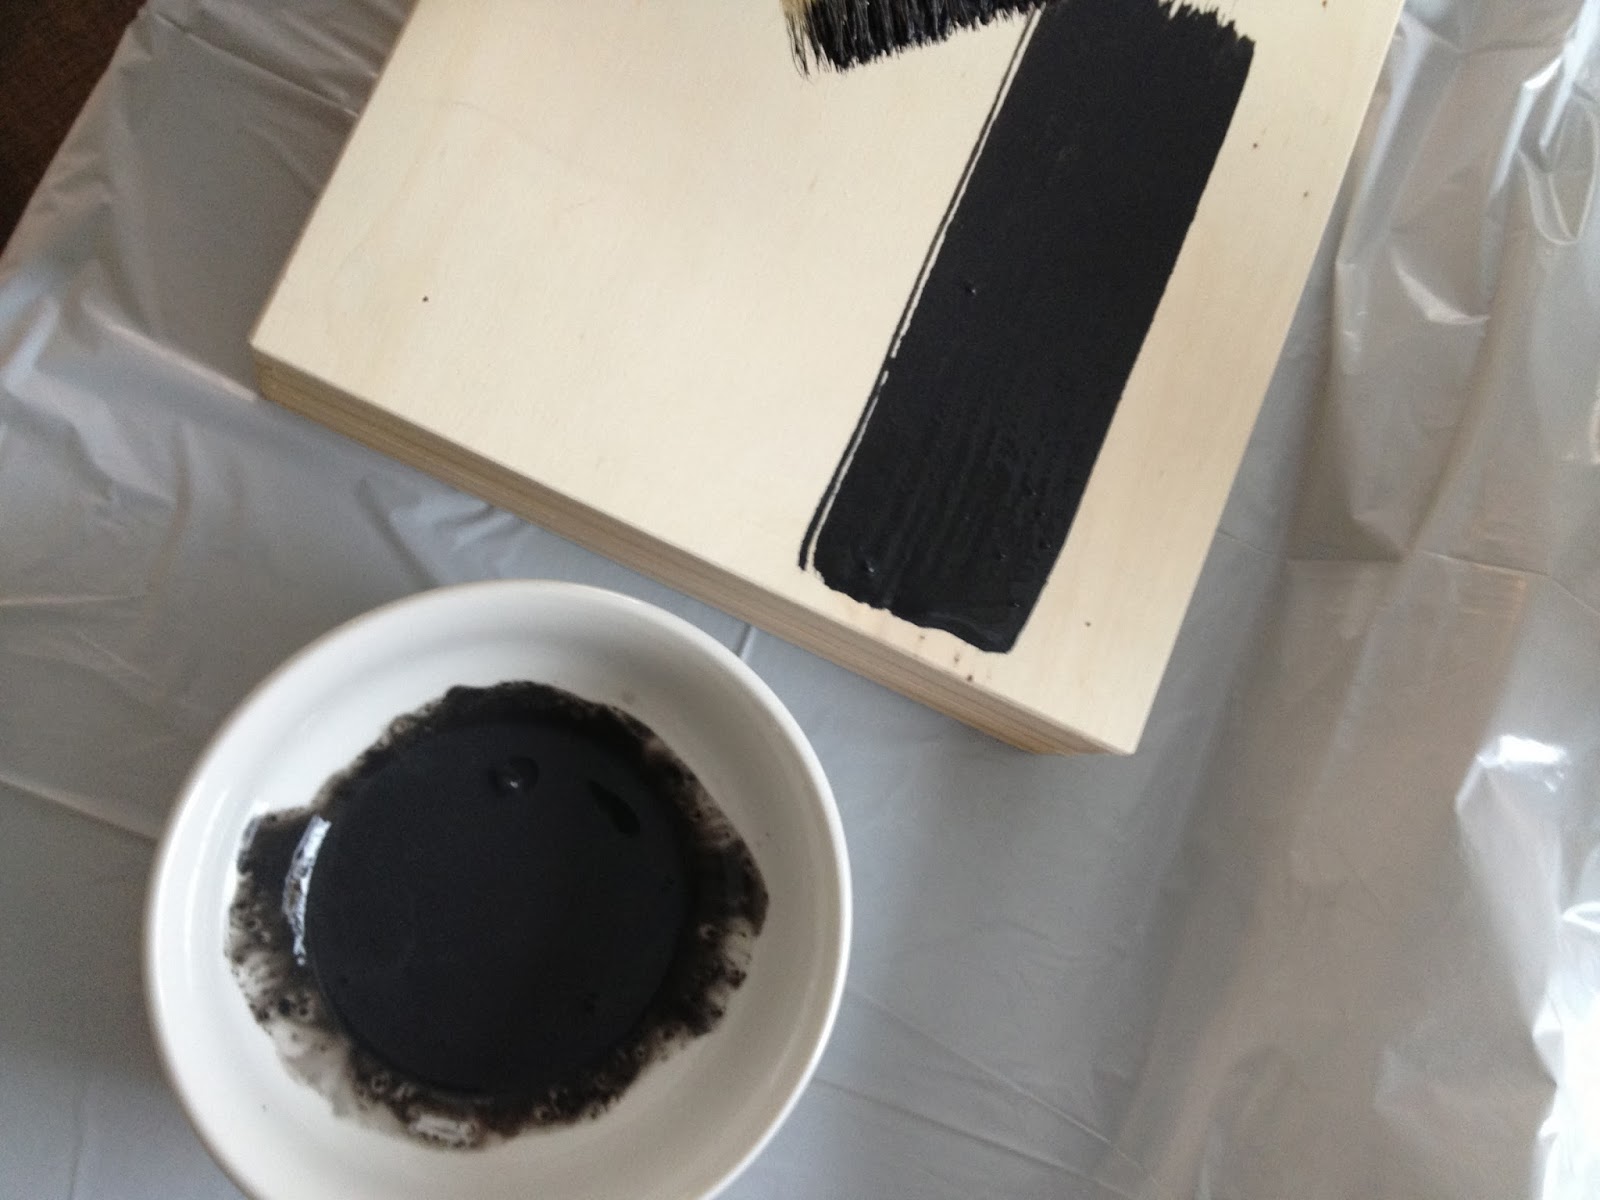
Next, I took some charcoal grey paint, watered it down til it was the consistency of heavy cream, and did a dark wash on the boxes, both inside and out.


Remember- when a bit of water is added, the paint wash will dry in a lighter shade than it looks when wet.

As the dark wash dried and the clock tick tock tick tocked, I probably did something fun like washed the dishes or changed the oil in my car.  


Ding!  Drying is done!  See that super clever thing I did there?  Pushpins in the bottom to keep the box off of the table- makes it dry all the way around without drip puddles forming on the bottom.  SO SMART.

For the next step, I watered down my gold paint (slightly thicker than heavy cream this time), and painted just the outside of the box.  I let each box sit for a minute before using a few scrunched up paper towels to slightly wipe off the gold, allowing the dark grey to show through- I was going for a distressed, old gold, not really gold but kind of, you can still tell it's wood, but not stained wood, kind of look.  Did I succeed?


That's really neat.

After the boxes were completely dry, it was time to do some lettering.  I had an alphabet stencil, but decided against using it- I just didn't like the font enough.  I found a few ideas on how to transfer lettering, and decided to try one out.  

I printed my lettering backwards on a sheet of paper and placed it on my box.  I then wet down the paper, and used the cap of a marker to rub the backside of the letters, hoping to transfer the ink off of the paper and onto the wood.


I don't remember what font this is, or I'd share it with you.  Sorry.

No dice.  I read back through the instructions, and noticed that the website stipulated that I use an inkjet printer.  Damn it...I have a printer that uses toner.  Across the street neighbor Kristin to the rescue!  (Yes, we recycle names on our block- it's just too much trouble to learn new names.).  Kristin printed off my backwards letters on her inkjet printer, and I repeated the same process.


Not trying to pull a Rodman here.  Just visited south of the border.

This time, partial success.  I could see the lettering, but it wasn't very dark.  Ugh.  Looked like my "easy" project was acquiring additional steps.


The lettering was only visible in bright light.
The boxes are being put on a shelf with low lighting in front of it.  No dice.

Next, I tried to just trace my faint letters with a paint marker.  Utter failure.  I didn't even take a picture of this step- it was that horrible.  I do NOT have a steady hand, and my letters looked like a kindergartener did them.  I slightly sanded out the trace job, and wiped some new gold paint across my mess.  Good as new to start again.

I didn't want to give up on the font lettering I had printed out- I liked it too much to give in and use the stencil.  For my next try, I printed off my letters on heavy cardstock, and took the time to use a sharp knife to make my own stencil.  Yeah, this was starting to border on madness, wasn't it?  I used a foam brush to slightly tap some paint onto the box using my handmade stencil.  Success!!  (Mostly, anyway).


Oh man,  I should have dusted the shelf before taking a picture.  Yikes.
I'm not going back and photoshopping that out, though.  We keep it real at The Regular House.
And regular houses have dusty shelves.  Live with it.

It's not super crisp, but the more I look at the slightly wobbly lettering, the more I like it.  Gives it character (at least, that's what I'm telling myself).

While waiting for the lettering to dry, I found one more way of transferring this lettering that I thought I'd give a shot.  I glued a piece of wax paper to a regular piece of printer paper (waxy side out), and ran that through the printer.  Then, I used the cap of a marker to rub this onto the box, hoping the ink would transfer off of the slippery wax paper and onto the box.  No dice.  The entire internet lies.  This does not work.  Don't let anyone tell you it does.  Again, I didn't even bother taking a picture.  Just know that it failed.

So, there you go.  Some failures, and a "pretty good" success.  Now to fill my travel boxes with my leftover paper scraps so they're off of the dining room table.  Project complete, and the house has less mess.  Everyone wins.


Next up, it's a whole new shelf redo.  I mean, I can't leave the shelves untouched when they've got shiny new travel boxes sitting on them, right?  Right???

Thursday, January 9, 2014

I'm a Recipe Thief.

I made a delish dish for dinner tonight, and couldn't wait to share it with you.  I feel like my Facebook news feed and Pinterest home page have been inundated the past week with recipes that yell HEALTHY and LOW-CARB and GLUTEN FREE and SO GOOD.  I might as well jump on the bandwagon too, right?

Are you ready for it?  Yes?

Spaghetti Squash with caramelized onions and cheese in a browned butter sauce.  

I didn't make this dish with the intention of trying to be any of the yelly things above (well, except for the SO GOOD one).  I just thought it looked tasty.  I'm also going to admit right here and now that I stole this from Rachael Ray.  Sorry Rach, I tweaked it a bit.  RR drrroooooowwwwned this recipe in browned butter and cheese.  No need for that- a few tablespoons is enough.  In true RR fashion, though, this recipe has some EVOO, a pinch of salt thrown over the shoulder, and is YUM-O.  The caramelized onions were my idea, too.  What dish isn't made better by them??

Now, when RR made this dish, I only walked through the living room and back while the tv was on, so I didn't catch the whole recipe.  Oh well, I made up my own measurements for the dish.  Feel free to do the same- I'm not a big fan of measuring when I cook.

Here's what you'll need:

1 spaghetti squash (try to get a big one)  That's what she said.  God, I couldn't resist that one...too easy.
15 or so fresh sage leaves
2 Tbsp butter
2 Tbsp olive oil
1 onion
A handful of either shredded or shaved parmesan cheese (or any hard cheese that you like!)
A few pinches of salt
A few pinches of pepper
A few pinches of nutmeg
Extra olive oil for drizzling

Here's what you'll do:

Preheat your oven to 350 degrees.  While the oven is heating up, slice your spaghetti squash in half the long way and scoop out the seeds.

Place your squash on a tray cut side up, and drizzle with olive oil.  Sprinkle with salt, pepper, and nutmeg.  Turn the squash over so the cut side is now on the tray.  Pop that tray in the oven, and let it cook for 50-60 minutes.  (I turned a half over at 55 minutes and tried to shred it with a fork.  It began shredding easily, so I took it out of the oven.)

Killing two birds with one stone and cooking some butternut squash (on right) for later.
You only need to pay attention to the spaghetti squash on the left.

For the first thirty minutes while your squash cooks, go drink a glass of wine and read the latest news from TMZ.  Or, go clean the bathroom, paint your toes, or watch the news.  I don't care what you do, just don't stare through the oven window for 30 minutes.  You'll be bored silly.

After your squash has been cooking for a half hour, grab your onion and slice it up.  Cook them down in a pan, and attempt to caramelize them.  Or, you could do what I did and slightly burn the edges because you left your pan on too high while you were paying too much attention to the t.v. in the other room.  Lesson probably not learned, though.  I'll do it again.

Please don't judge my crappy iphone photos for this post.  I was too hungry to
worry about pulling out the camera for artsy fartsy shots.
While your onions are caramelizing, heat your butter and olive oil in a pan over medium heat.  Once your butter has melted, throw your sage leaves into the pan and let them cook for a few minutes.  Pull them out, and let them rest on a paper towel for drainage.

Oh, pretty!


At this point, your squash is probably ready to come out of the oven.  Take it out, and start scraping your fork into the flesh.  It'll come apart in stringy pieces, just like spaghetti.  Could you have even imagined* such a thing would happen??  I know, I was shocked.  

*Yes, the bold, italicized, underline word was necessary.  You and I both know there is someone reading this who is thinking to themselves, "Why is she surprised?  It's called spaghetti squash for a reason".  Le Sigh.  Sarcasm is so much harder to hear in typefont Helvetica than when it comes straight from my mouth.

Shred it, baby.


Ok.  Now that your squash is spaghetti'ed, throw it in a bowl and pour your sage infused browned butter/oil over it.  Mix it up.  Plop your caramelized onions on top, followed by your parmesan cheese.  

You're almost there....remember those sage leaves you left sitting on a paper towel?  They should be crispy enough that you can just crumble them over your bowl.

Well, it may not present as the prettiest dish ever, but it sure tastes good!!

Annnnd you're done.  Take note- if you're eating this for your main course, equate 1 serving as half of the spaghetti squash, meaning the recipe serves 2.  If you're making this as a side dish, the recipe serves 4.

Enjoy!!!  (I did.)

Tuesday, January 7, 2014

Cameras and Foam...a likely combination.

Happy Two Zero One Four, everybody!!  We're a week into the new year, and it's time for more DIY craftiness...I know you missed me.  I missed you, too.

Dave and I went on vacation over the Christmas holiday, and OH, WAS IT GLORIOUS.  No, we didn't do a beach in Waikiki, we didn't see the pyramids in Egypt, and we didn't hop along with the kangaroos in Australia.  We went to Europe, woot woot!!  More specifically, we spent our vacation in Dave's motherland..the Netherlands.  That's right, my 6'2" blue eyed hunk o'man lives up to the bloodlines of his ancestors who proudly stand up to the distinction of being the tallest people in the world.  Man, I got a crick in my neck just by talking to people the whole week!  


Sigh, can I go back?
Such a lovely time.

Before we left for this lovely and relaxing vacation, however, I had some crafting to do.  The night before we left, I began packing.  I am normally the worst suitcase packer ever, and usually attempt to bring my entire wardrobe with me where ever I go.  This time, knowing I'd be hauling my suitcase from plane to train to tram, I tried to downsize.  I managed to limit myself to one normal sized suitcase and a carry-on bag that held my purse, i-pad, a book, our travel documents, and the camera.  

Here's where the DIY comes into play.  When we go on vacation, Dave and I like to bring along the bigger camera that has several lenses.  Bringing along the camera bag, however, adds one more piece to carry.  Ugh.  I've seen various camera bags online that double as purses, and I've also seen some great DIY camera cushion inserts for purses.  Seeing as I had about T-12 hours before departure, buying a camera bag/purse was out of the question.  A camera cushion insert?  Totally doable.

I rifled through my craft closet, hoping to find some thinner foam padding, but alas, no luck.  I did have a thicker hunk of foam, which I figured would work in a pinch.  I also had a nice piece of fabric that I had just used for a small Christmas gift, and wanted to use it up on something cute.  Perfect!

I started off by stealing a few knives from the kitchen- a bread knife and a steak knife.  Feeling uneasy with this project yet?  I also grabbed my sewing scissors, not knowing what would work best on attempting to fillet the foam pad down to a desirable thickness.

I ended up using both the bread knife and the scissors.  It would have been much easier if I had just used a 1" thick foam pad, but beggars can't be choosy at 9:00 at night.  The clock was ticking.  
Wow.  Check out that yellowing action on the edges of that foam.  Classy.


Next, I measured the flat bottom of my purse, and made sure that my large piece of foam was cut to fit this size.  I then cut 4 additional pieces that were a few inches high to make the walls of my foam "box".  


The sides cut to fit the long lengths of the bottom pad.
It doesn't matter that they're not 100% smooth- they're going inside of a fabric sandwich soon.

Next, I cut six pieces of fabric.  I cut two pieces to make sleeves for the long sides, two pieces to make sleeves for the short sides, one piece to make a sleeve for the bottom piece of padding, and a white piece of fabric to hold it all together. 


Isn't that cute fabric??

 For each foam piece, I essentially cut enough fabric as if I was cutting wrapping paper to wrap a present.  I folded the fabric over, sewed two sides, and stuffed the foam in.  I wasn't going for super precision here...it's going to be shut up inside of a purse.  Also, the clock continued to tick, and I needed to finish packing and get to bed!!


Yep, the foam is in there.

After my 5 foam pieces were packed in nice and tight to their fabric homes, I needed to connect them together.  Here's where the white piece of fabric comes into play.  If you notice from the photo with the white fabric above, I cut off the corners to make a small flap on each side.  This flap would be sewn into the open end of each fabric pouch.  A picture's worth 1,000 words, right?  Here's what I ended up with:


All 4 foam side pieces sewn to a flat bottom.

The next picture shows the above picture with the large foam pad sitting on top of it.  This will all make sense in a moment.


Ahh, get it now??

Once inside the purse, the four pieces attached to the white fabric fold upwards to conform to the sides of the purse to make a nice cushioned box for my camera.  
Pretty nifty, no?


Perfect fit.

I bought this purse last year at DSW for $5, no joke.  It's actually a really nice leather purse in a pewterish color, with several inside pockets and a removable cross body strap.  It's too big to carry on a daily basis, but it's great for traveling.  I was able to stuff two passports, lipstick, cell phone, credit cards, a city map, Flat Margot, and some change into the side pockets.  Perfect.

My regulars know who Flat Margot is, but in case you haven't been introduced...


Flat Margot rides a bike along the canals in Amsterdam.

And the camera bag/purse?  Worked perfectly!!  The camera came back in one piece, and it captured some great memories, too.  Like this one.


Always ask someone holding a better camera than yours to take your picture.
They won't mess it up, and they won't try to steal it.
They also won't be able to make your husband smile for a picture.
Like, ever.

Ready for a teaser for the next post?  It includes paint, cigar boxes, and water.  Take your best bet.  I guarantee you're wrong.  Unless you follow me on Pinterest, in which case, you'll probably figure it out.  Happy crafting, kids!!